WordPress is the most commonly used CMS or content management system that developers and designers prefer. It is worth mentioning that WordPress is much secure by itself. Still, it is essential to include some more security options to prevent various malicious activities. There are several Security Plugins available to add an extra layer of security to your WordPress website. One such comprehensive plugin offered by the WordPress is the All in One WP Security & Firewall plugin. It is easy to use with plenty of features with in-built firewall protection too. And, the most appealing part of this plugin is that it is 100% free.
Therefore, the All in One WP Security & Firewall plugin offers a complete solution for your WordPress security. It is also one of the best ways to secure every WordPress installation available out there as offered by WordPress Hosting.
Table of Contents
How to Install and Activate the All In One WP Security Plugin?
This is a very simple and straightforward procedure just like any other WordPress plugins.
Step1: You need to log in to the WordPress Admin Dashboard of your website.
Step2: From the Dashboard, click on Plugins and then Add New.
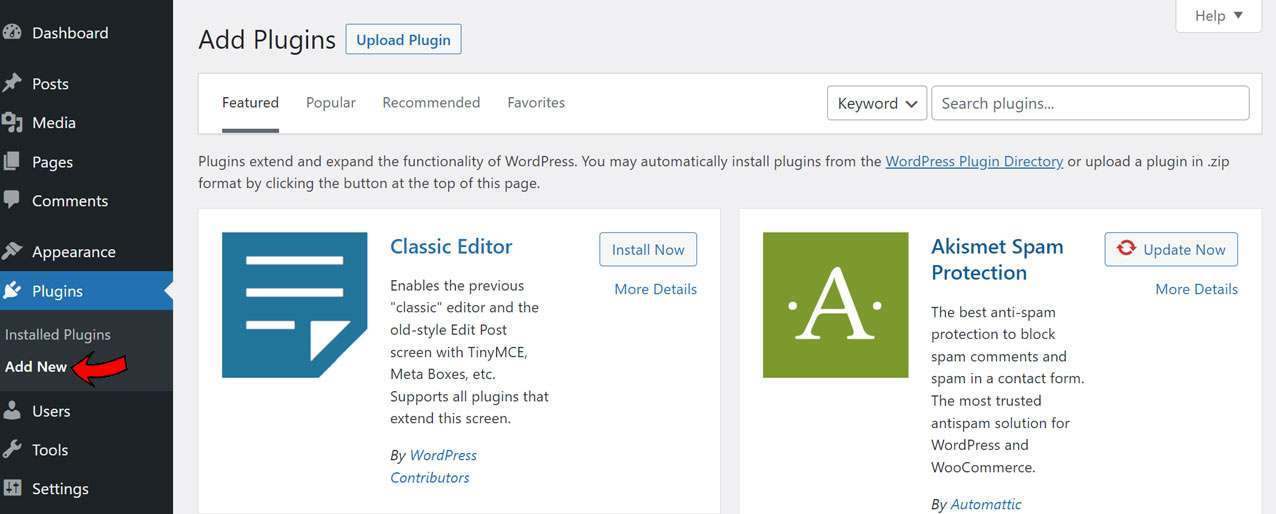
Step3: In the Search Box of that plugins page, you can search for the ‘All in One WP Security Plugin‘.
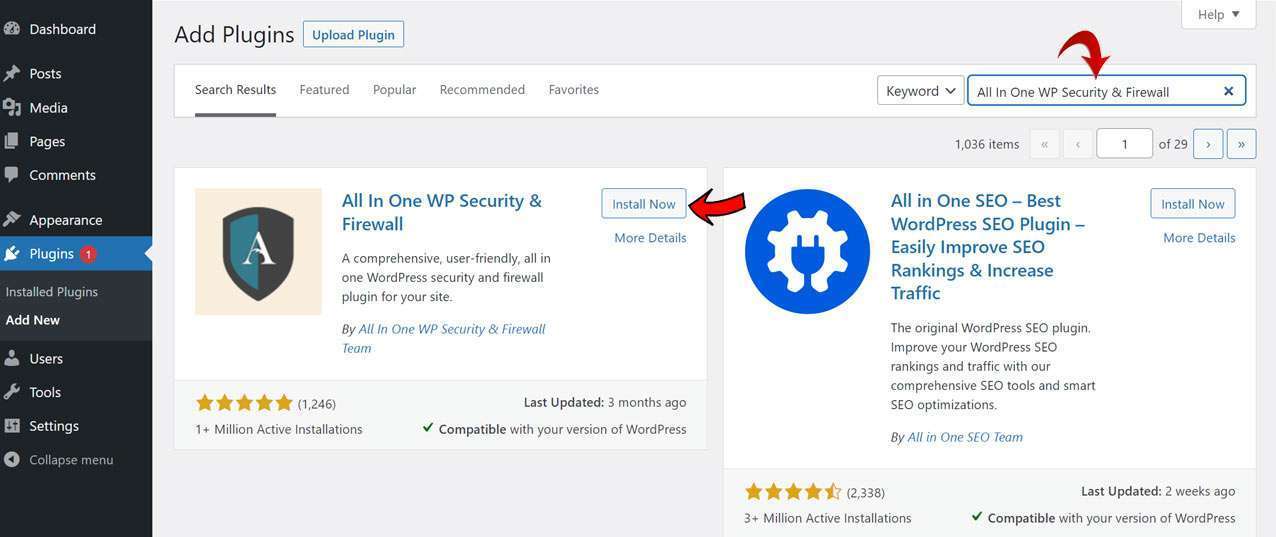
Step4: It will pop up at the first on your screen. Click on ‘Install‘ and then Activate it from there.
Step5: A new option will appear on your left panel of the dashboard called WP Security.
There will be various subdivisions under the WP Security option in the dashboard. Let’s walk you through the different options which will make you aware of the different security features offered by this All in One WP Security Plugin.
[affcoups id=”4850″]
Features Offered by the All In One WP Security & Firewall Plugin
Under the WP Security main option, you will have 4 tabs. The first tab is the Dashboard, where it shows the strength of your website that is evaluated based on certain factors. It follows a scoring system to generate certain points and calculates the score of your website.
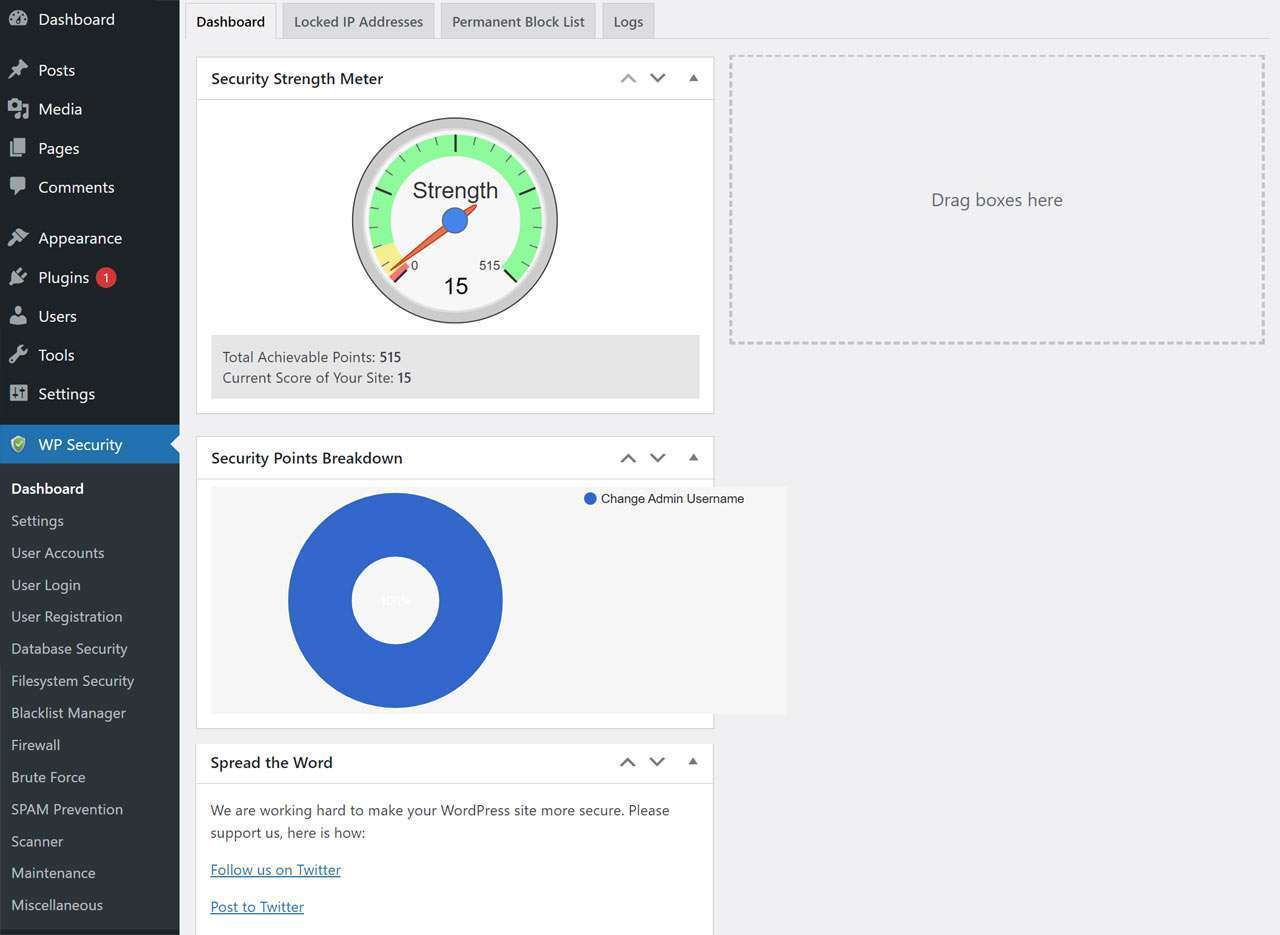
The current score of your site should be above 250 and that can be achieved following the different features or options offered by All in One WP Security plugin that will be discussed below.
User Account Security:
From the expanding options, you need to select User Accounts. That page will contain 3 tabs – ‘WP Username’, ‘Display Name’, and ‘Password’.
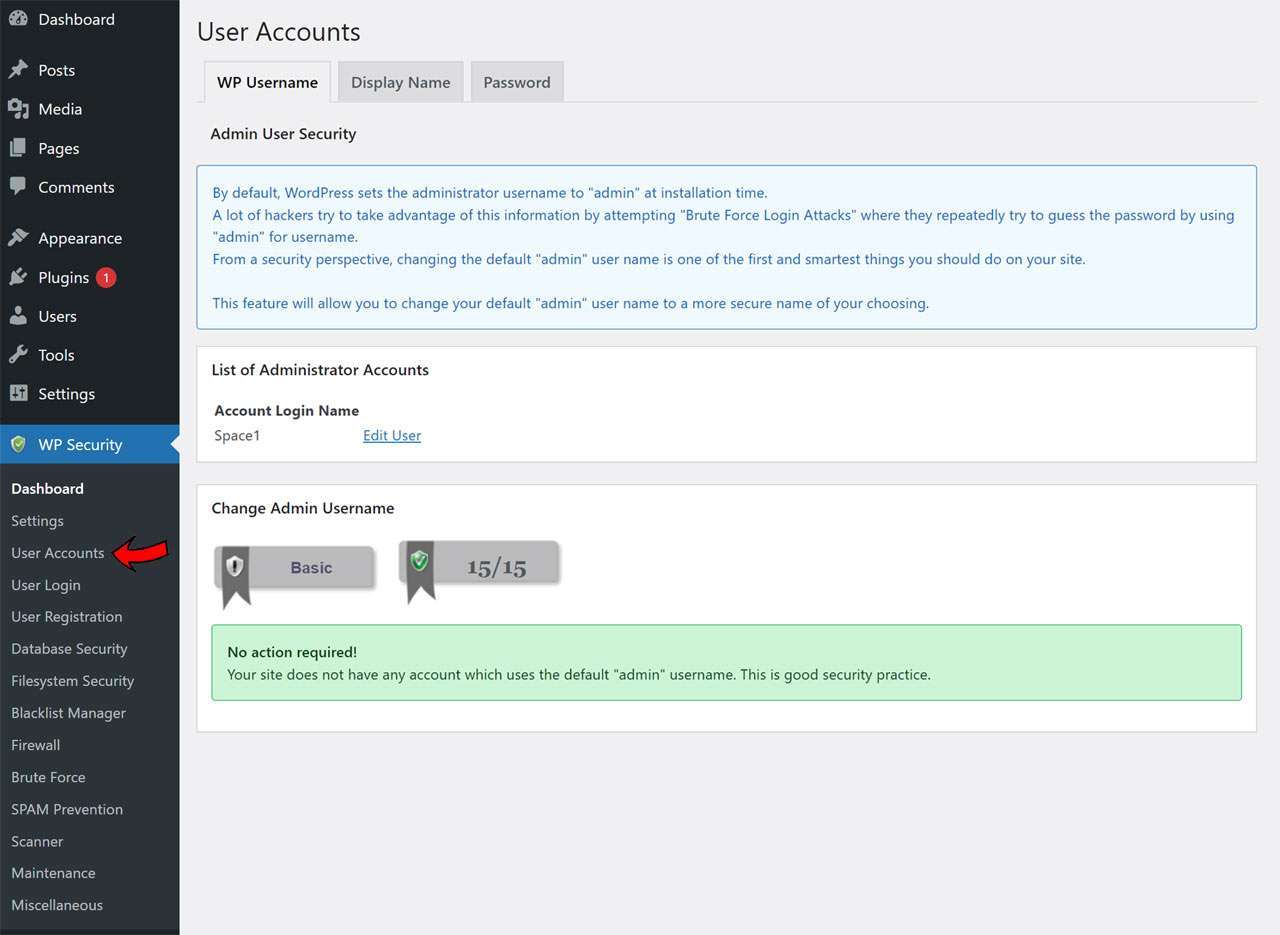
WP Username tab helps to check whether the Username is set to the default ‘admin’. This is not a secure practice at all. From the Display Name tab, it will check whether the display name is similar to the username. If it is so, then it is highly insecure since hackers will get your username easily. The Password tab lets you identify the Strength of the Passwords you set.
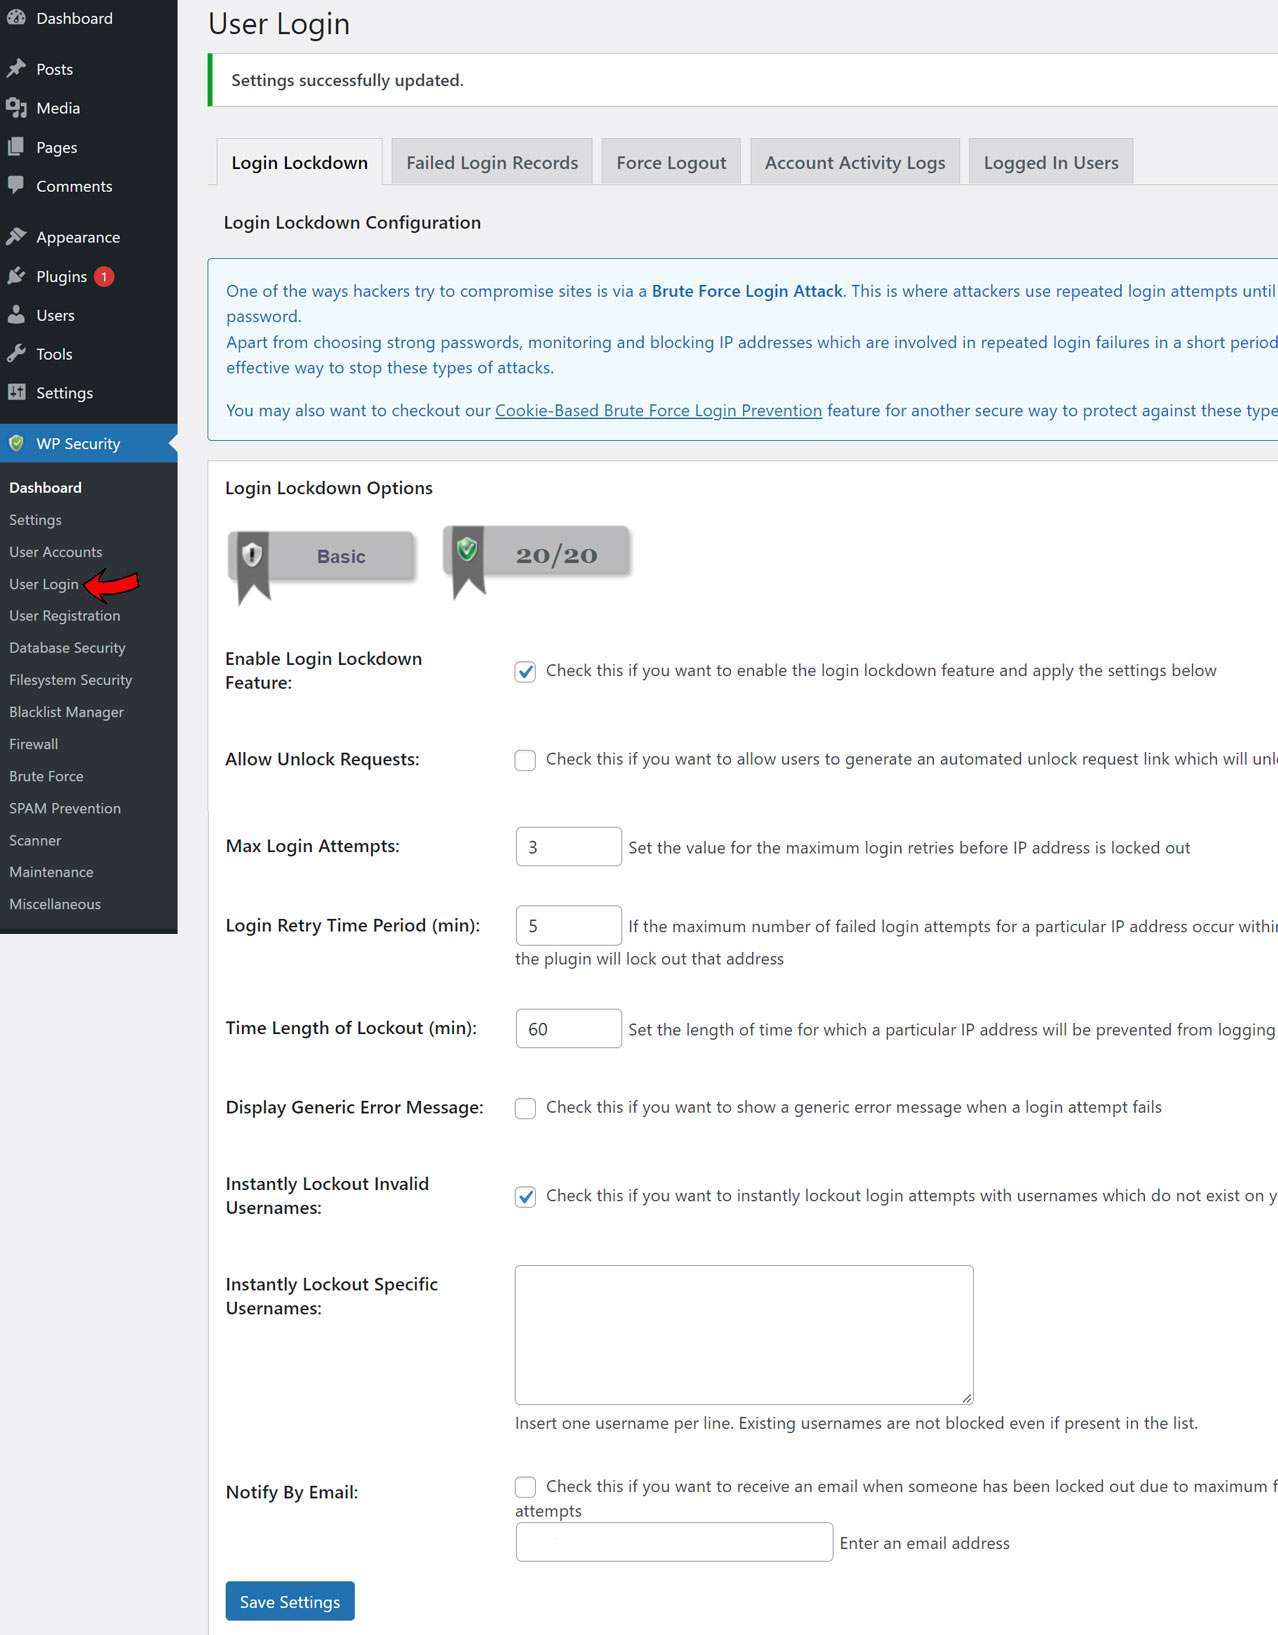
User Login:
This option contains 5 tabs in all but you need to configure only two – Login Lockdown and Force Logout. The rest three tabs store the information and logs regarding users logged in at a particular moment.
In the Login Lockdown tab, you need to set limits on the login attempts. These rules will provide prevention against Brute Force Login attacks. Keep all the settings as default, just check the ‘Enable Login Lockdown Feature‘ and save the settings.
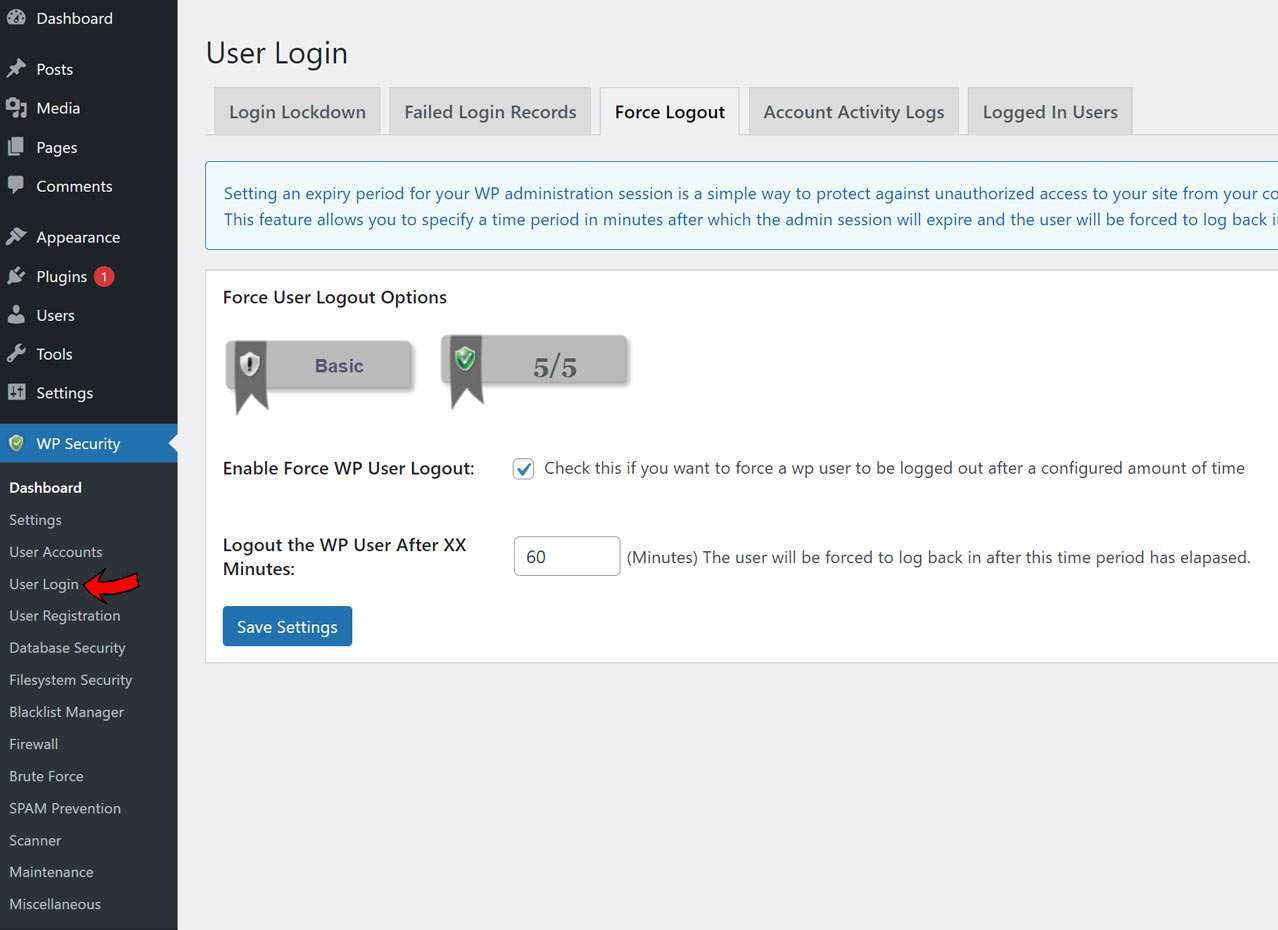
The Force Logout tab enables you to configure the auto-logout feature of WordPress after a certain duration. It is very helpful if WordPress users are logging in from a public terminal. Check the ‘Enable Force WP User Logout‘ and save the settings.
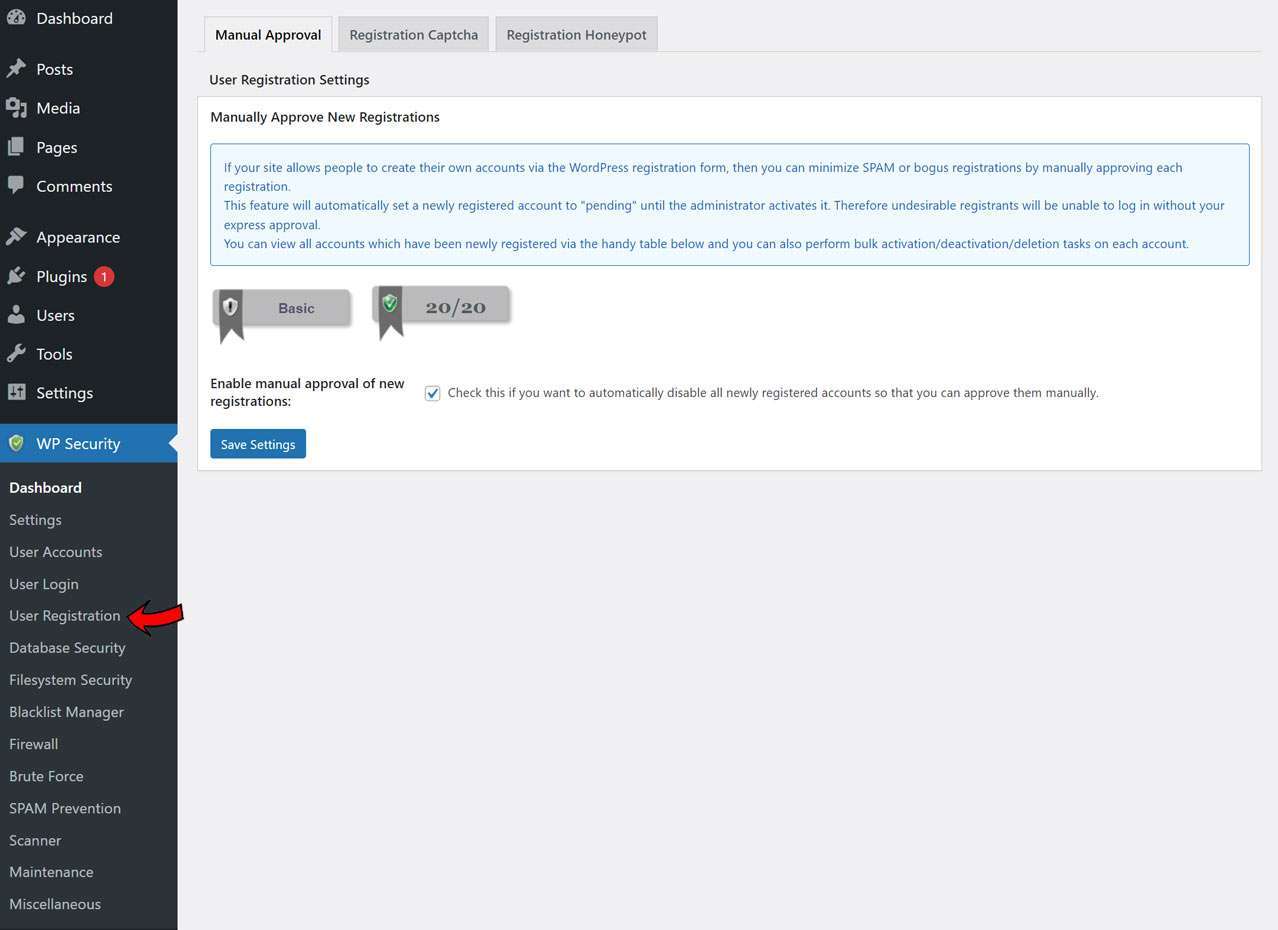
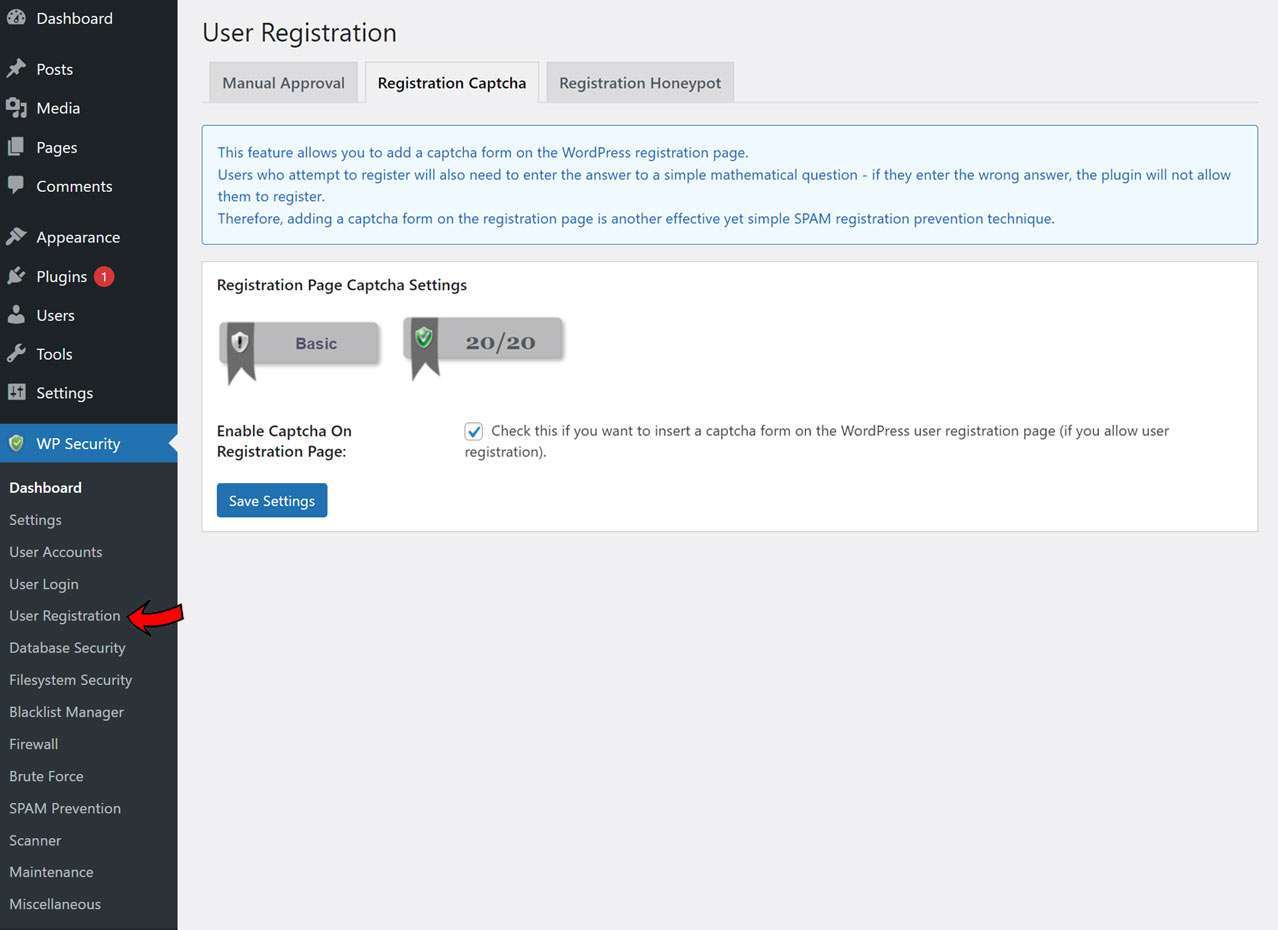
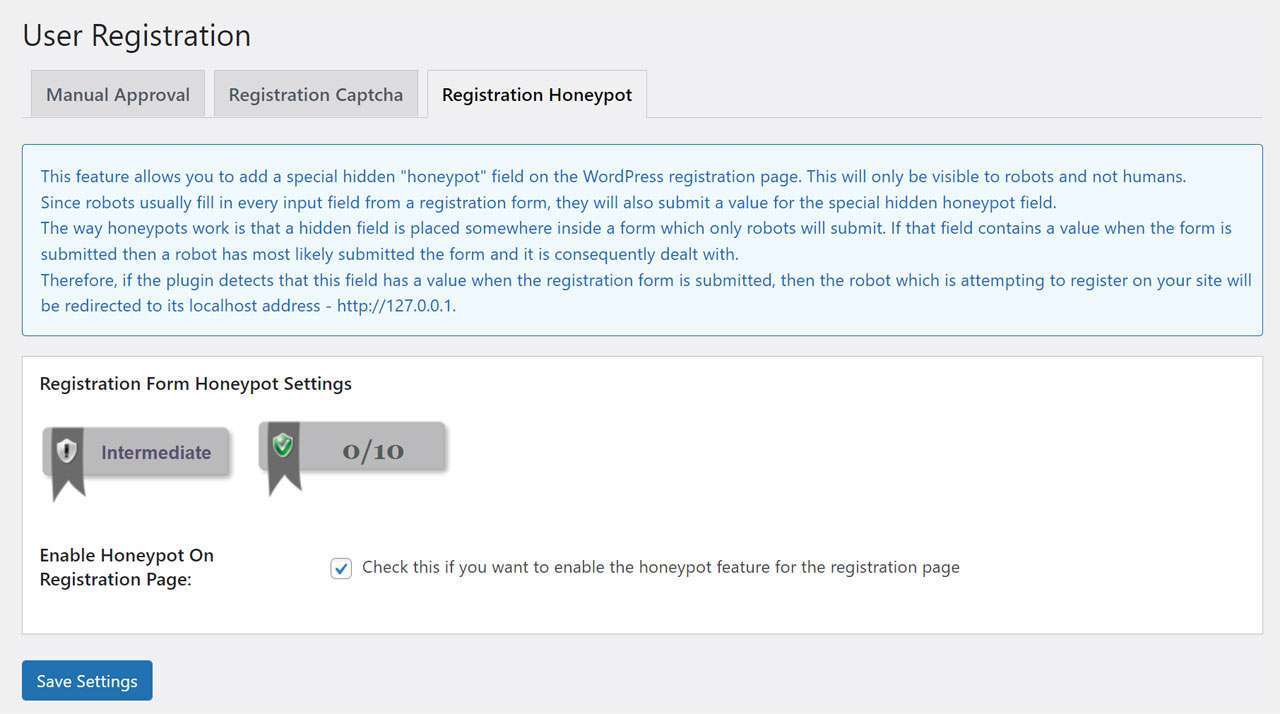
User Registration:
The User Registration option of All in One WP Security plugin contains 3 different tabs – ‘Manual Approval’, ‘Registration Captcha’, and ‘Registration Honeypot’. The websites that include some form of user registration can achieve many benefits from this option.
From the Manual Approval tab, you can prevent bots from registering on your site. Check the ‘Enable manual approval of new registrations‘ which will force the users to register after approving manually.
The second tab ‘Registration Captcha‘ works as per the name. It allows you to add a captcha to your registration form as an extra security layer.
The third tab of ‘Registration Honeypot‘ enables you to add some hidden fields that only bots can fill out. This will help you to identify the bots and hence prevent them from making new accounts. Like the above ones, here also you only need to check the checkbox for enabling it.
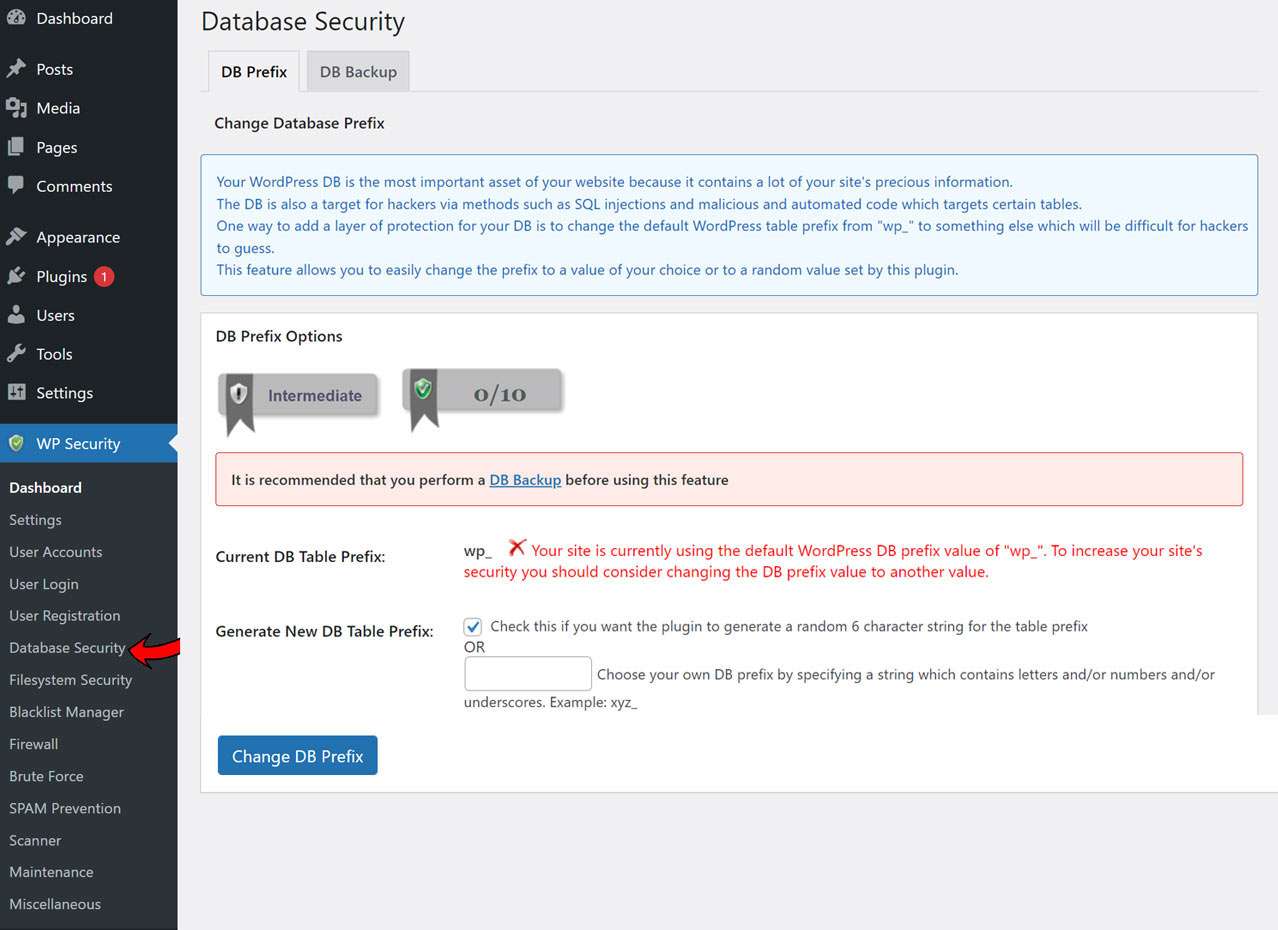
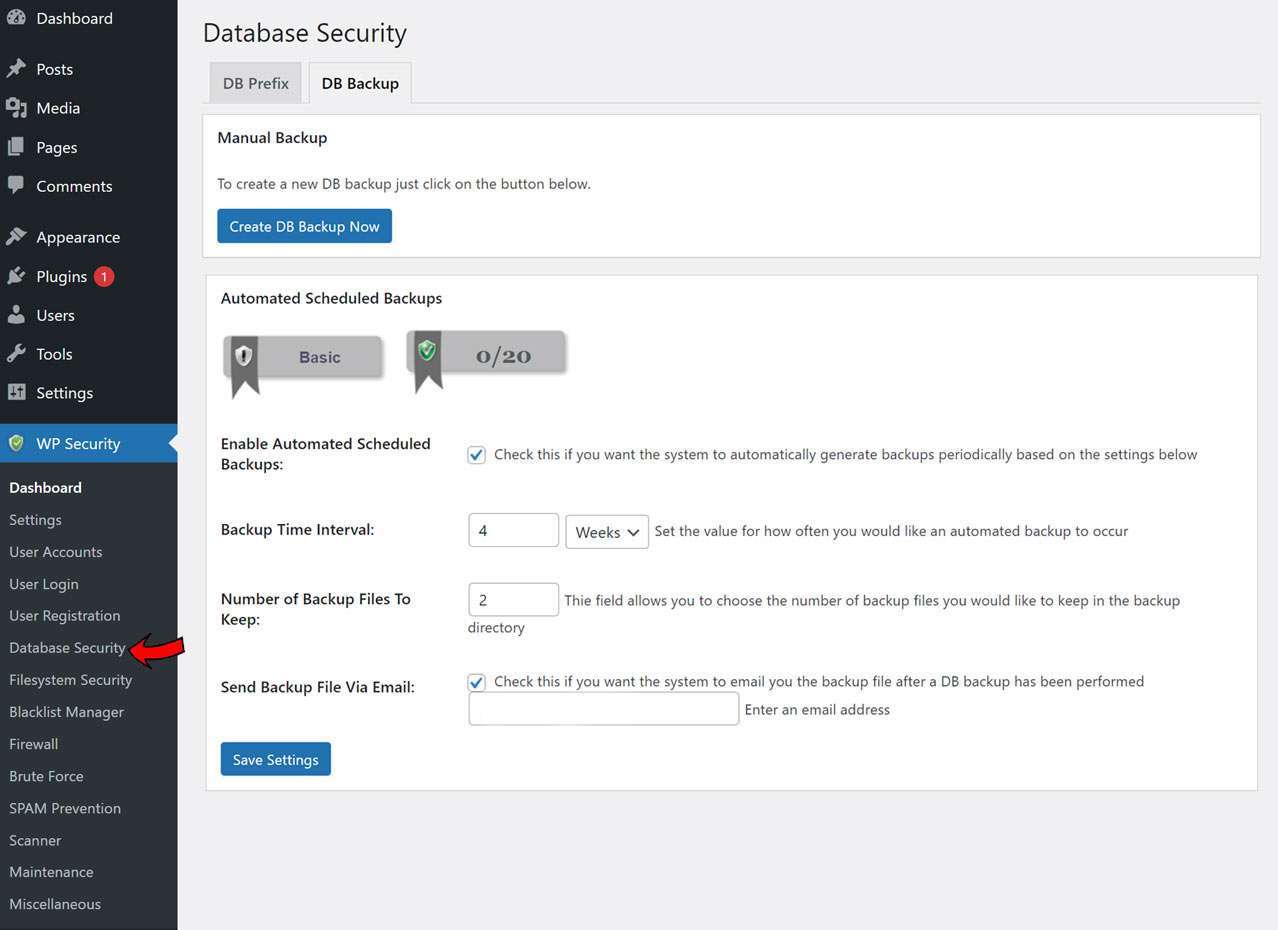
Database Security:
This option for database security has 2 tabs – ‘DB Prefix’ and ‘DB Backup’. You need to first head over to the DB Backup tab and take a backup of your entire database so that data doesn’t get lost after making changes.
So, in the DB Backup tab, you need to click on ‘Create DB Backup Now‘ and then check the checkbox to Enable Automated Scheduled Backups. Alongside, you can also set a backup schedule as per your preference. After all, these are done, just save the settings.
Then, you can go to the DB Prefix tab to change the prefix of the database table. This enhances the security as it helps to prevent SQL Injection attacks because the default prefix is manually changed. For that, navigate to the ‘Generate New DB Table Prefix‘ and check the box to automatically generate the prefix or enter a custom prefix. Once done, click on the change DB Prefix option.
[affcoups id=”5001″]
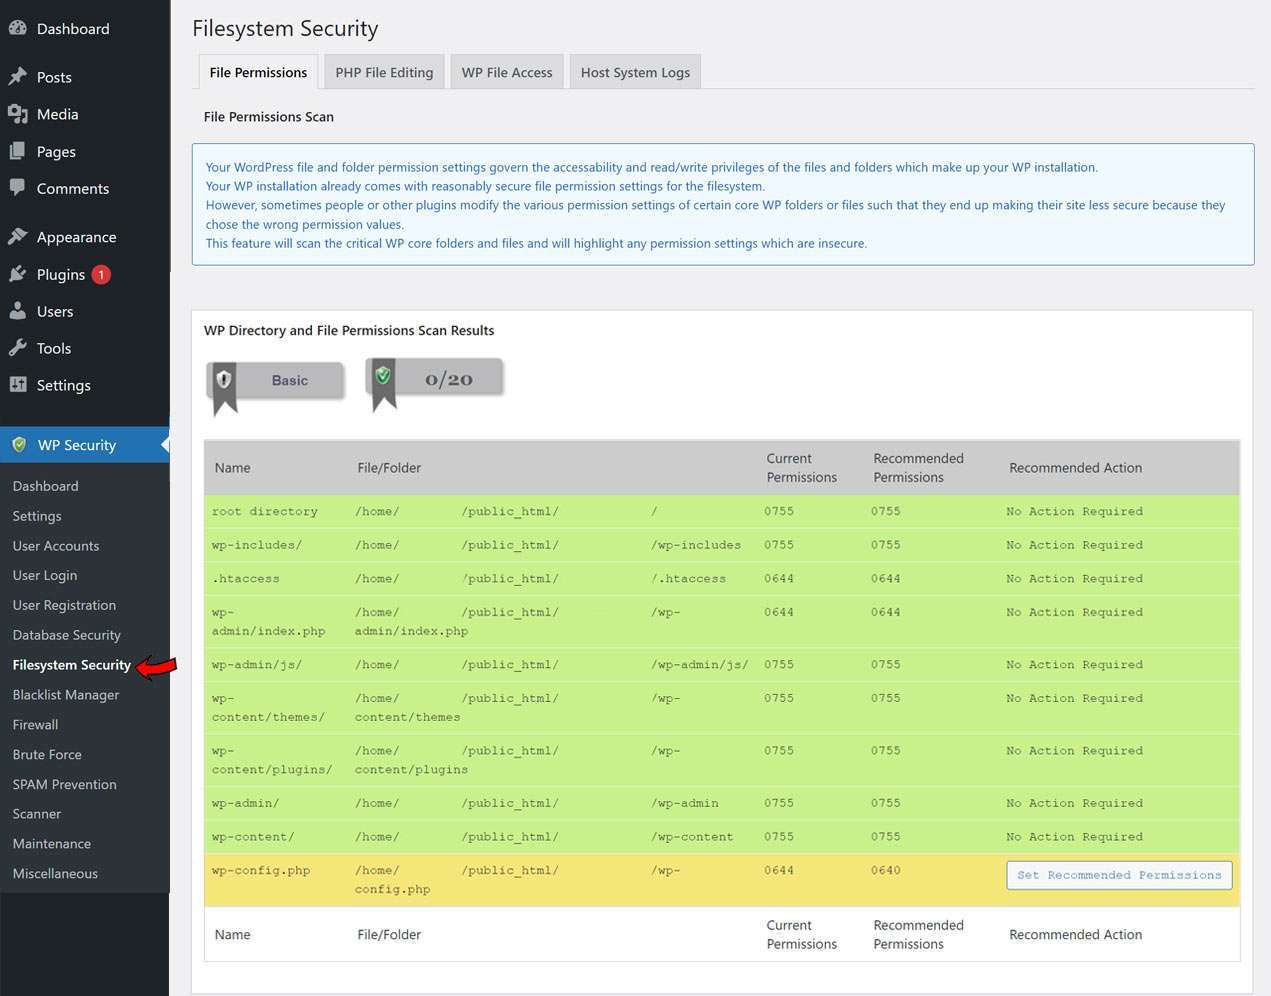
Filesystem Security:
This area will list out all the critical files and also list out the file permissions. There are ‘Set Recommended Permissions‘ buttons next to each of the files but if that doesn’t work, you can use an FTP program or the chmod (change mode) command.
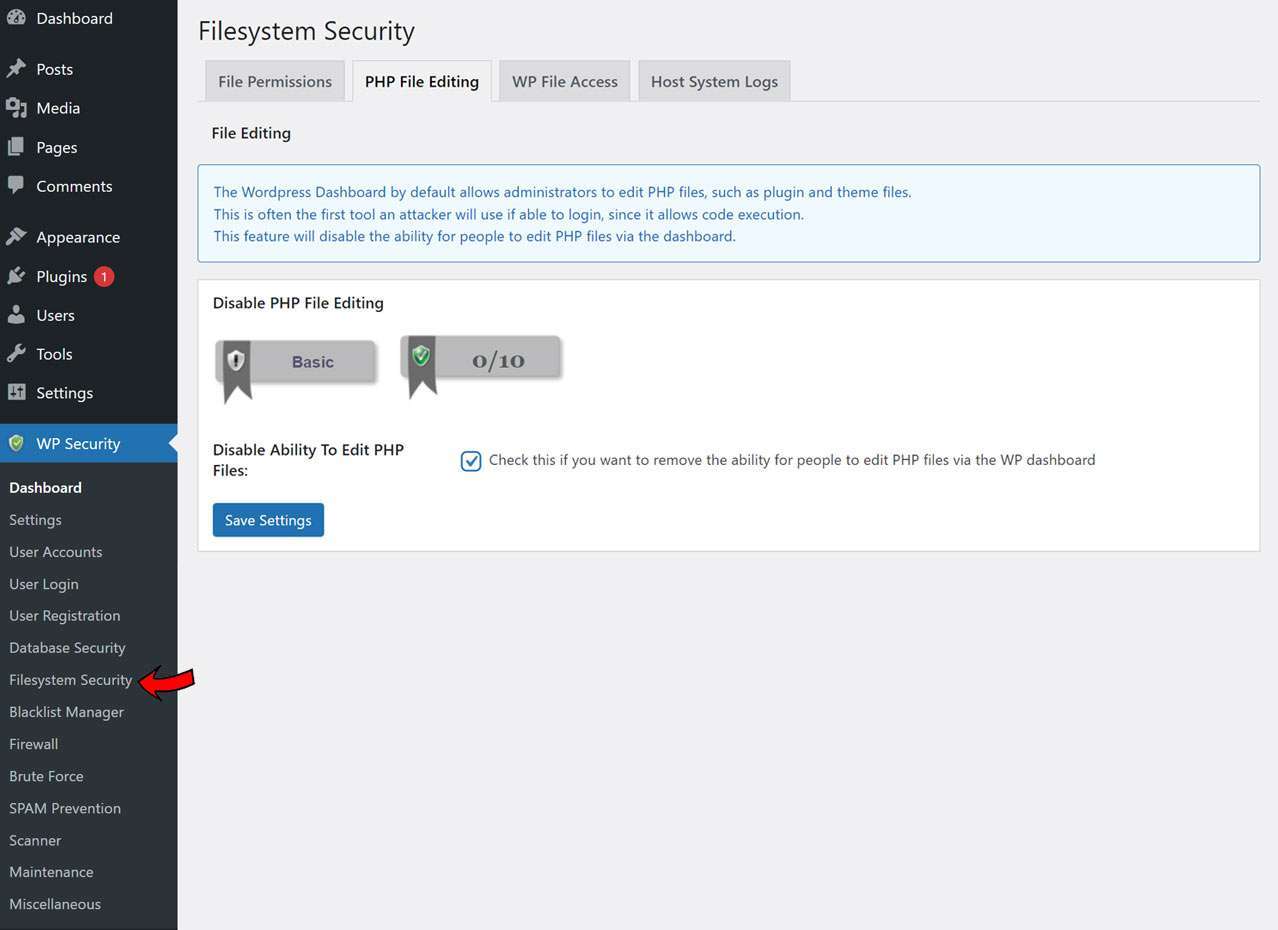
As per the default settings, any user logging to the dashboard with admin access can edit the PHP code files that include the plugin or theme files. So, since this involves direct code editing, it is the most targeted place for hackers to tamper. So check the ‘Disable Ability To Edit PHP Files‘ so that PHP files can’t be edited from the WP dashboard.
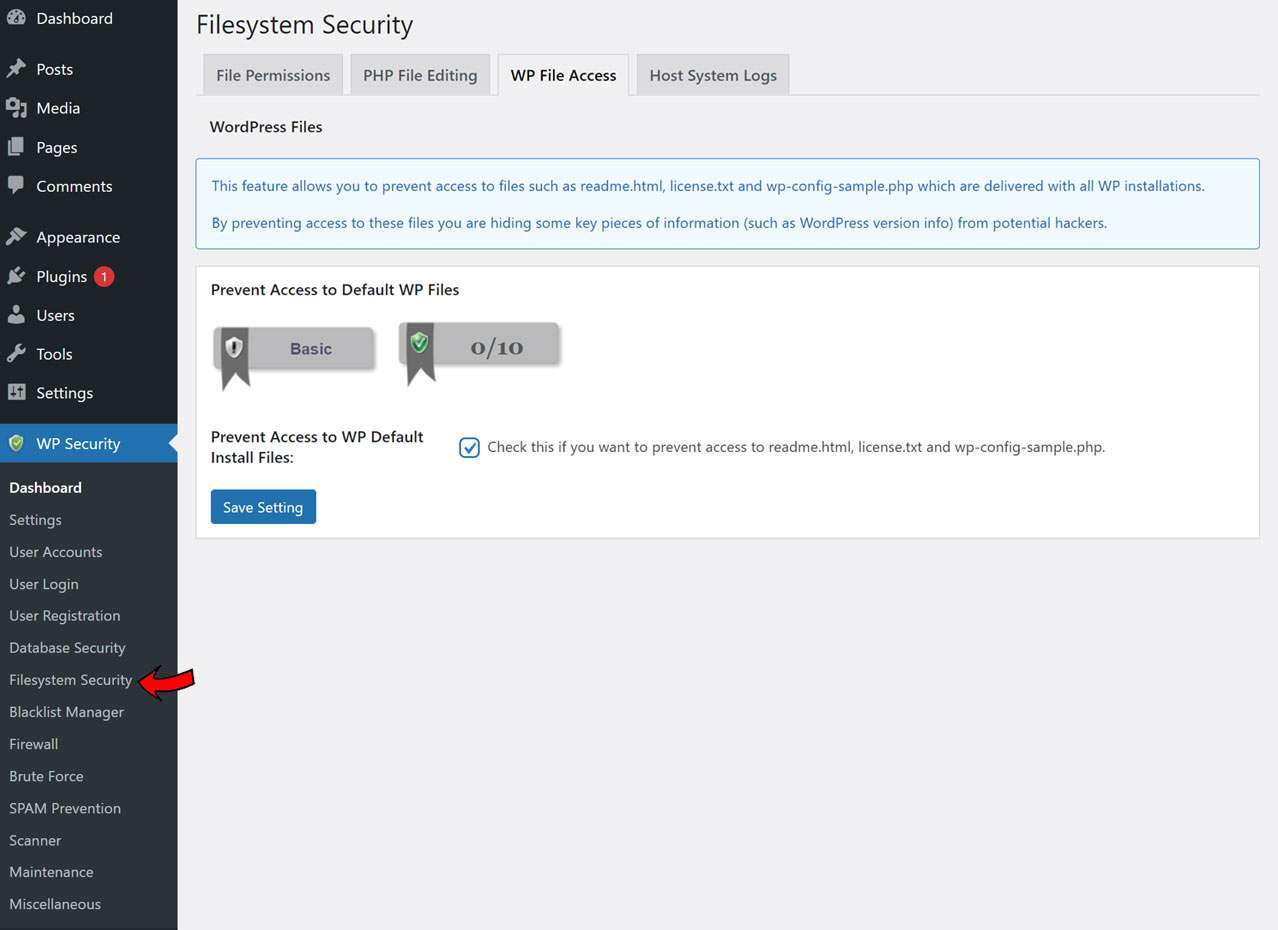
Then, just click on the WP File Access tab and check the ‘Prevent Access to WP Default Install Files‘, and save the settings.
Blacklist Manager:
This option under the All In One WP Security plugin enables you to set the IP or User-agent blacklists. Just check the ‘Enable IP or User Agent Blacklisting‘ checkbox and save the settings. Later, you need to add the IP Addresses that you are planning to block.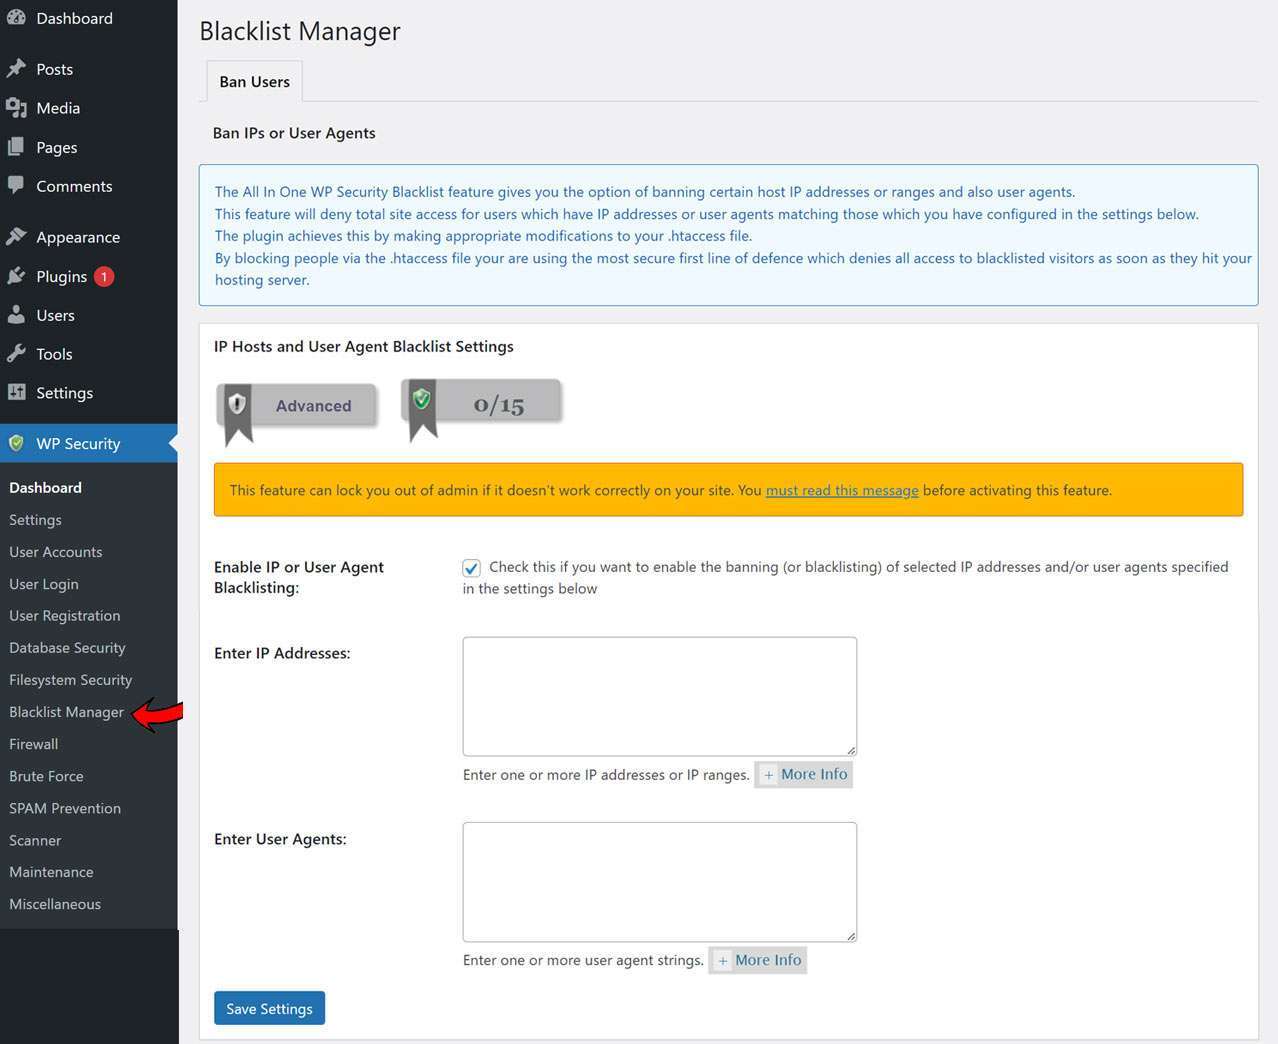
Firewall:
Here comes the most interesting in-built firewall feature offered by All In One WP Security plugin. You need to configure all the 6 tabs present under this option except the ‘Custom Rules‘ tab. The first tab is the ‘Basic Firewall Rules‘ tab. Under this tab, there are 3 check boxes that you need to enable.
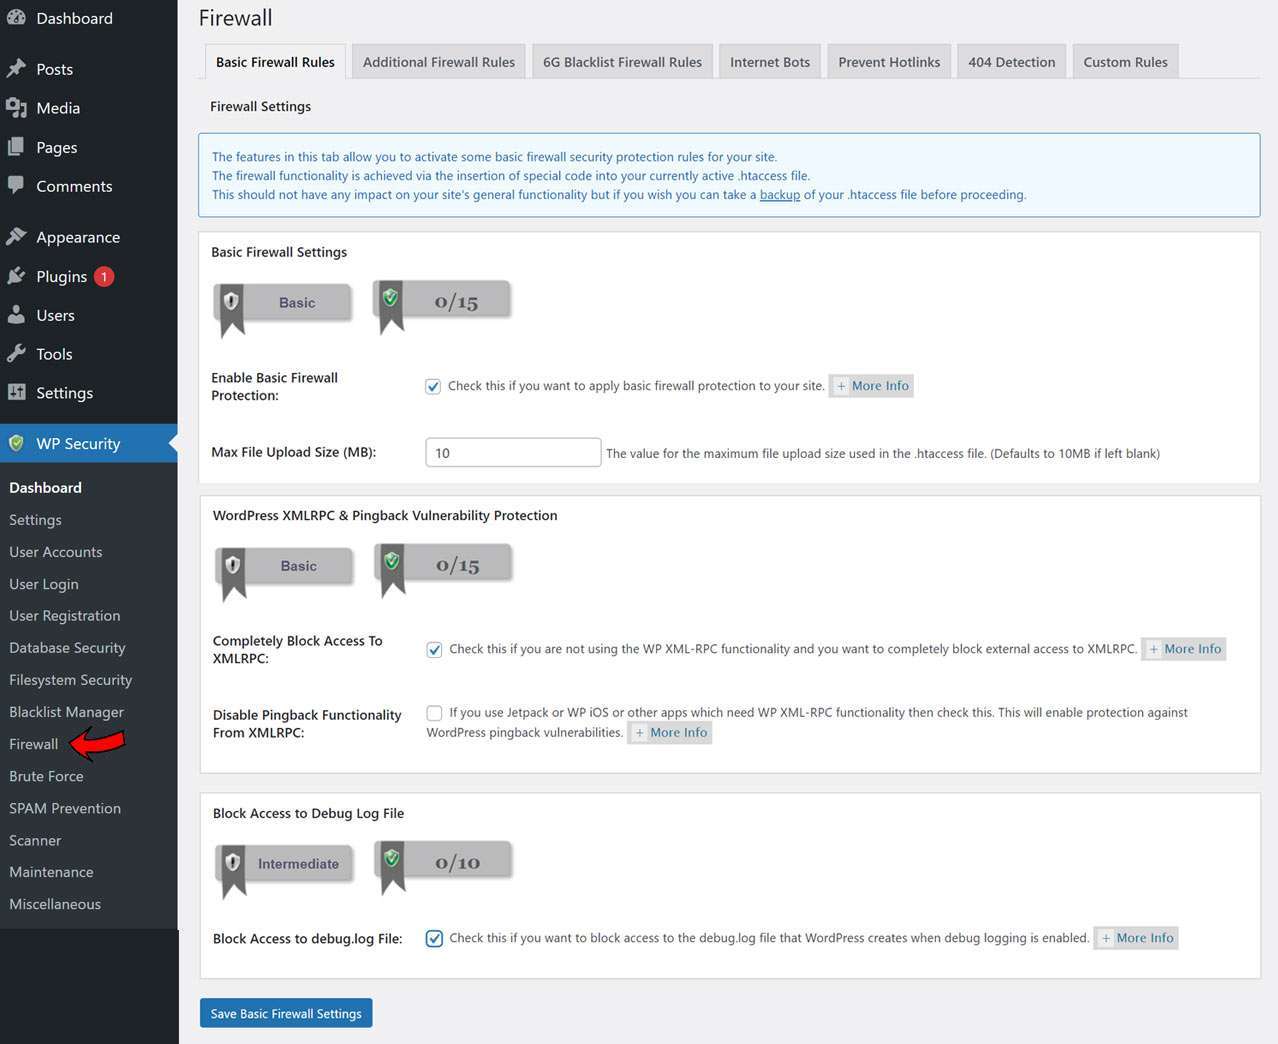
Firstly, you need to ‘Enable Basic Firewall Protection‘ which turns on the ‘Basic Firewall’ and prevents access to the WordPress Filesystem. Secondly, check the ‘Disable Pingback Functionality From XMLRPC‘ or you can also check the checkbox to ‘Completely Block Access To XMLRPC functionality‘. Thirdly, you need to ‘Block Access to Debug.log File‘ and then save the overall settings.
[affcoups id=”5381″]
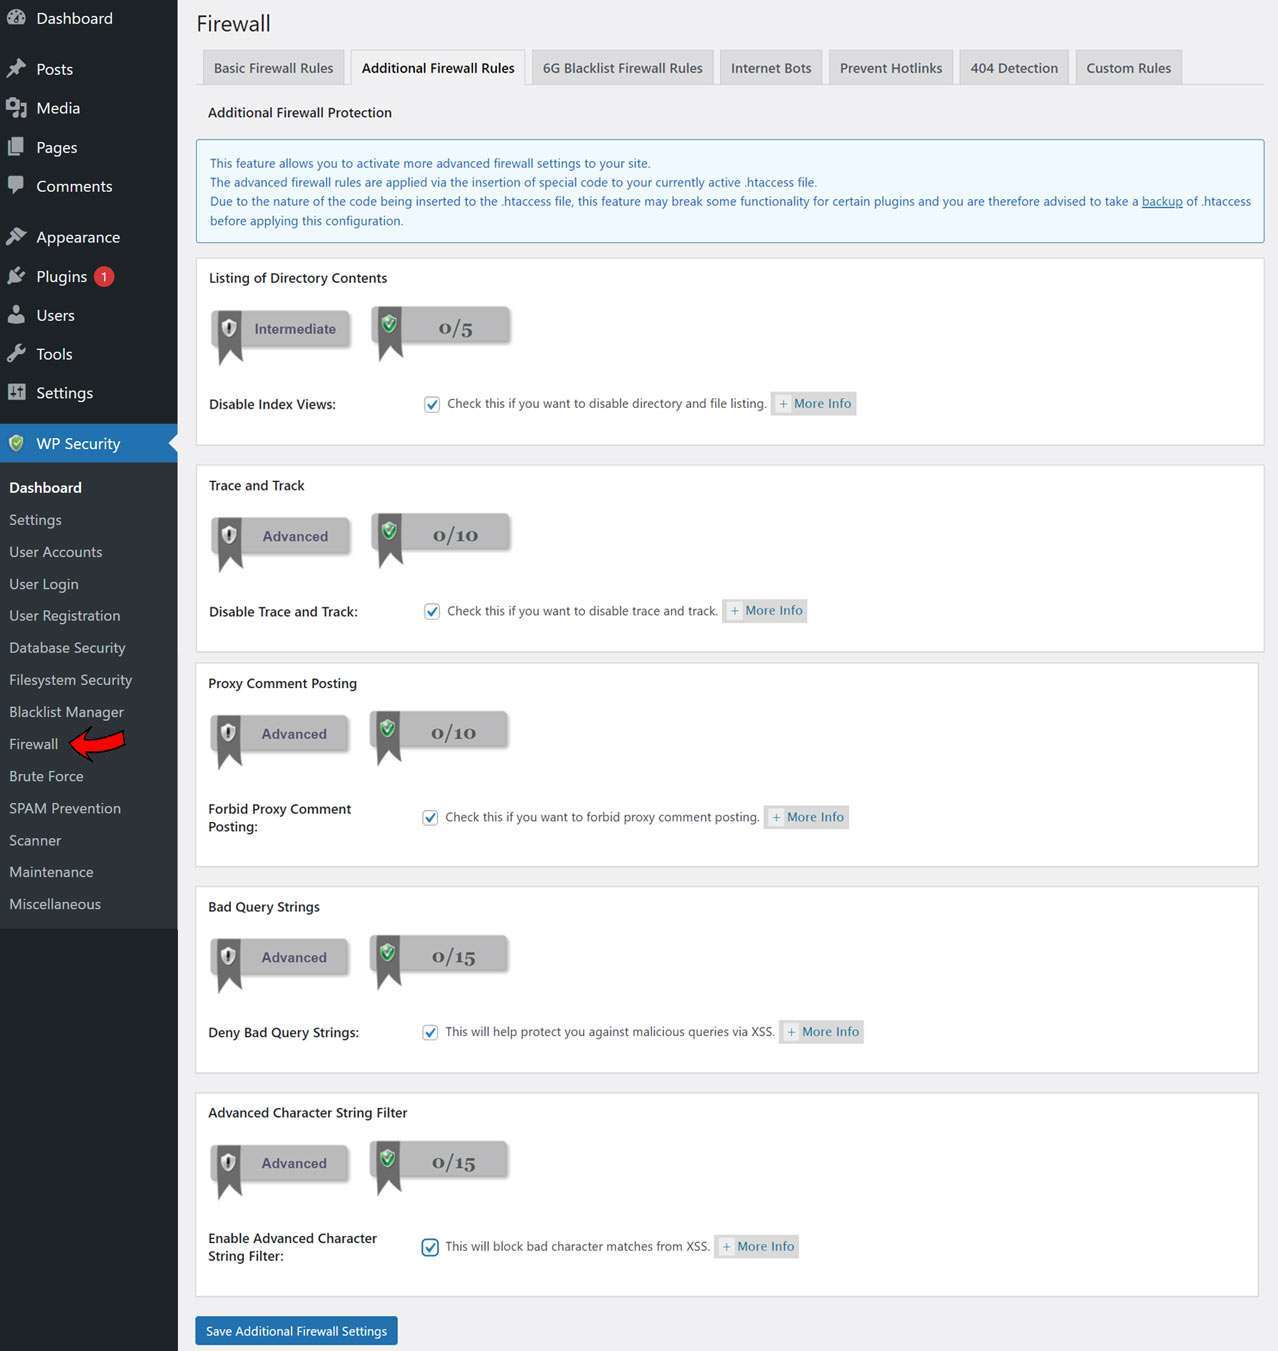
For the next tab ‘Additional Firewall Rules‘, just check all the available options and save those additional settings.
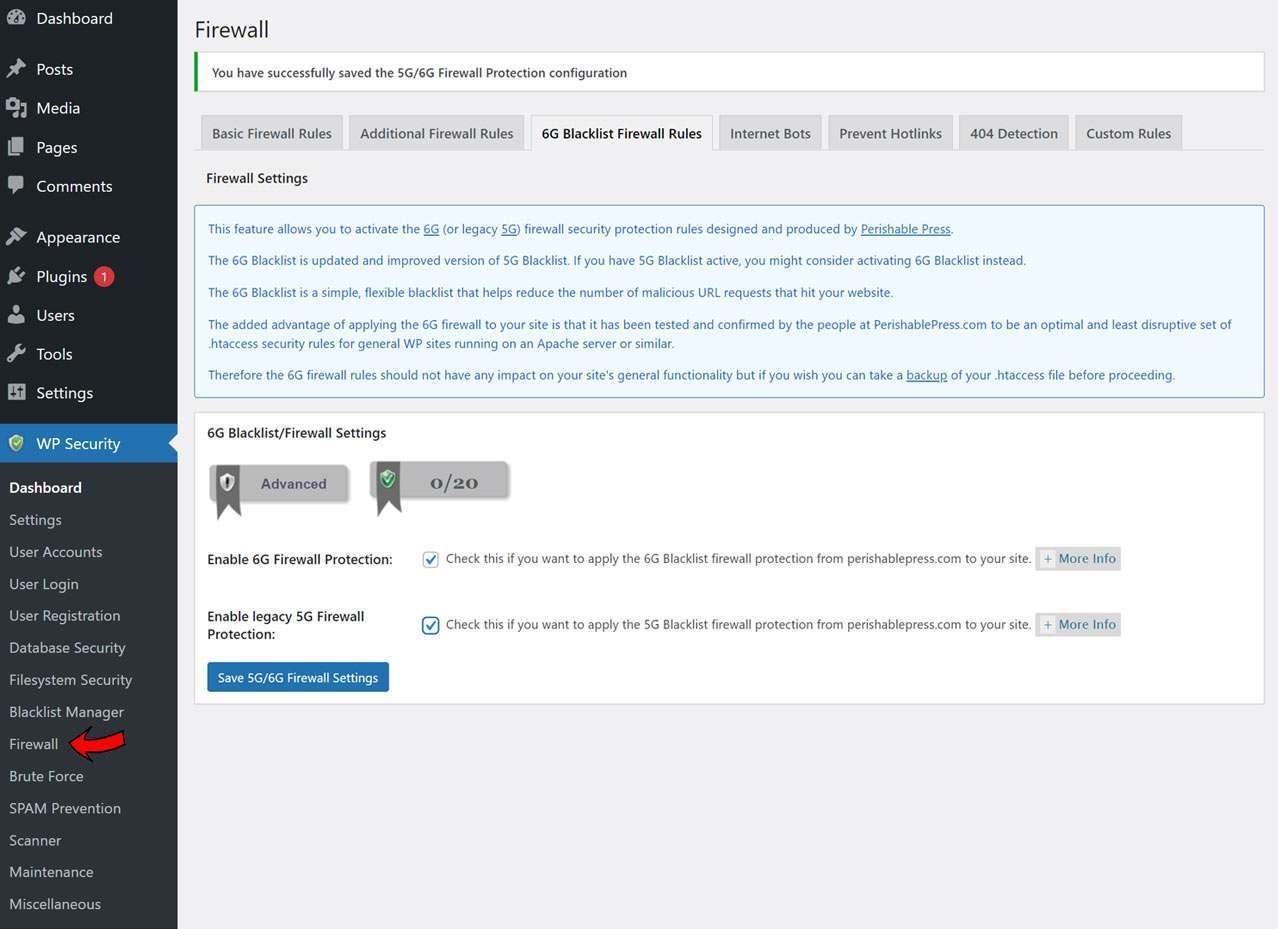
The next tab is quite important which is the 6G Blacklist Firewall Rules tab.
Here, you must check the ‘Enable 6G Firewall Protection‘ and ‘Enable Legacy 5G Firewall Protection‘ which add the blacklists from perishablepress.com to the firewall.
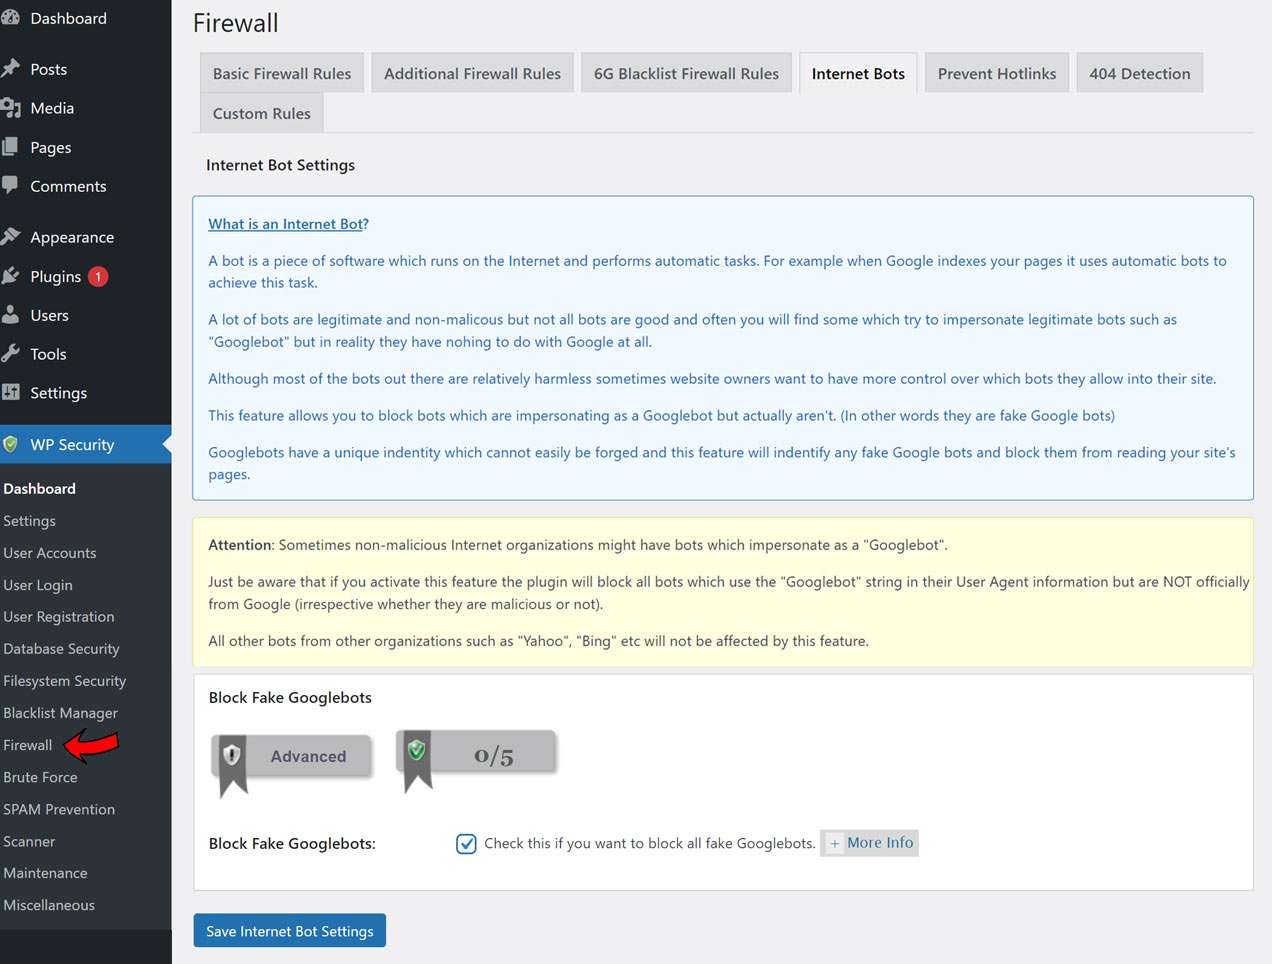
Then just check the check boxes present under the ‘Internet Bots’ tab and the ‘Prevent Hotlinks’ tab. They do the functionalities as per their names. Lastly, under the ‘404 Detection‘ tab, you need to check the checkbox for preventing those IPs that repeatedly try to reach the non-existent pages.
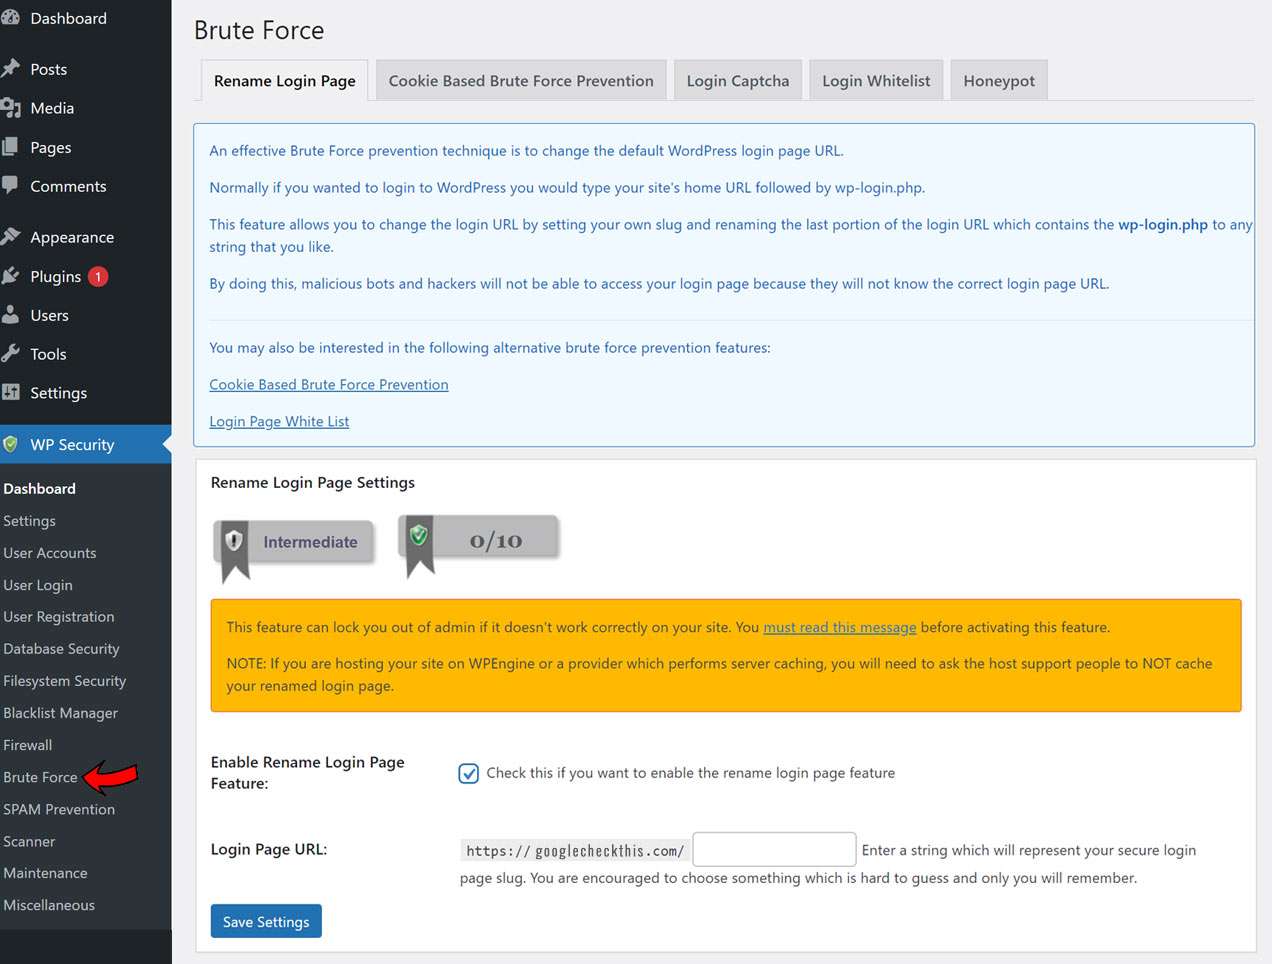
Brute Force:
The Brute Force option helps you to configure the login page settings with 5 tabs. You can set up the 2 tabs- ‘Rename Login Page’ and ‘Honeypot’ by default. The rest of the 3 tabs, namely ‘Cookie Based Brute Force Prevention’, ‘Login Captcha’, and ‘Login Whitelist’ must be used in a selective manner as they are platform specific.
[affcoups id=”5379″]
Under the tab named Rename Login Page, you have to check the ‘Enable Rename Login Page Feature‘ and enter the new login page URL before saving the settings. This will add more security since bots can hack the default login page URL than the custom one.
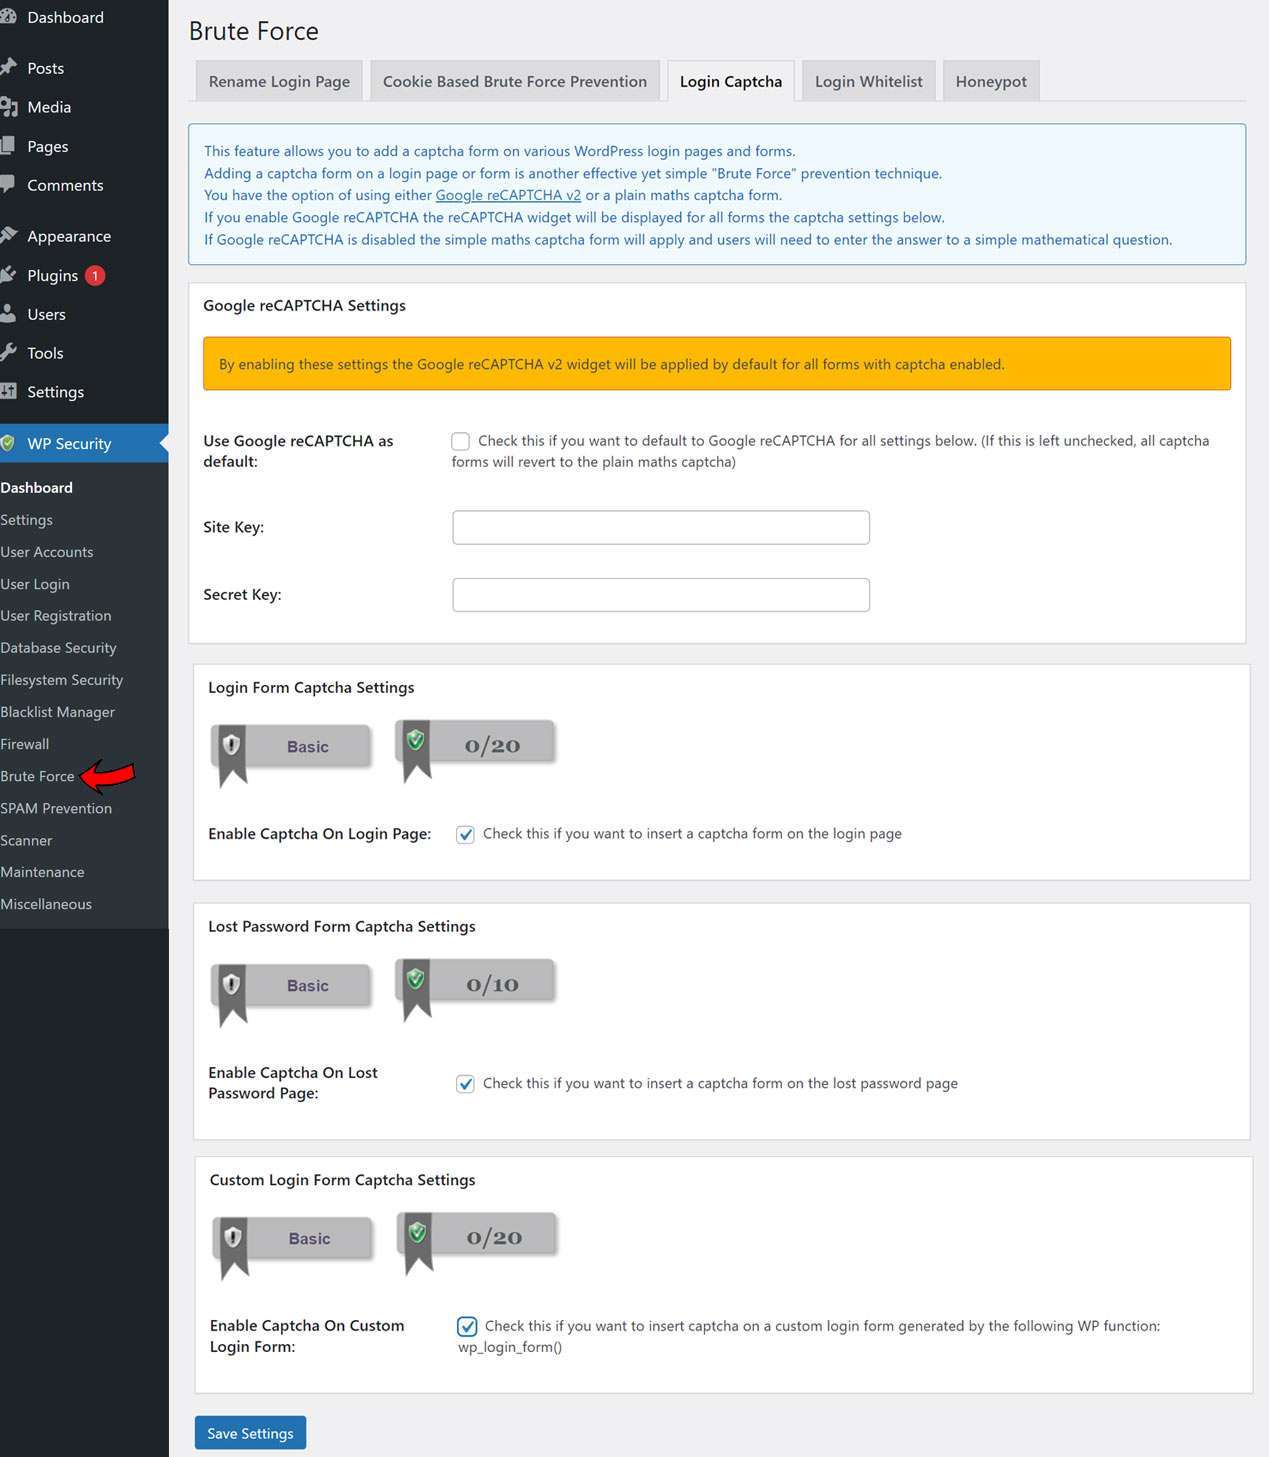
Next, the Login Captcha tab is also useful to add extra security layer so that the malware attacks can be reduced to a greater extent. You can use the ‘Google reCAPTCHA Settings‘ and check the checkbox to include Google reCAPTCHA for all forms. There are also options to include ‘Login Form Captcha Settings‘, ‘Lost Password Form Captcha Settings‘ and ‘Custom Login Form Captcha Settings‘. After all are done then click on ‘Save Settings’.
For the Honeypot tab, check the ‘Enable Honeypot on Login Page‘ checkbox and save the settings. This will add secret fields on the login page that bots can only fill in. In case those fields are filled in, WordPress will ignore the user.

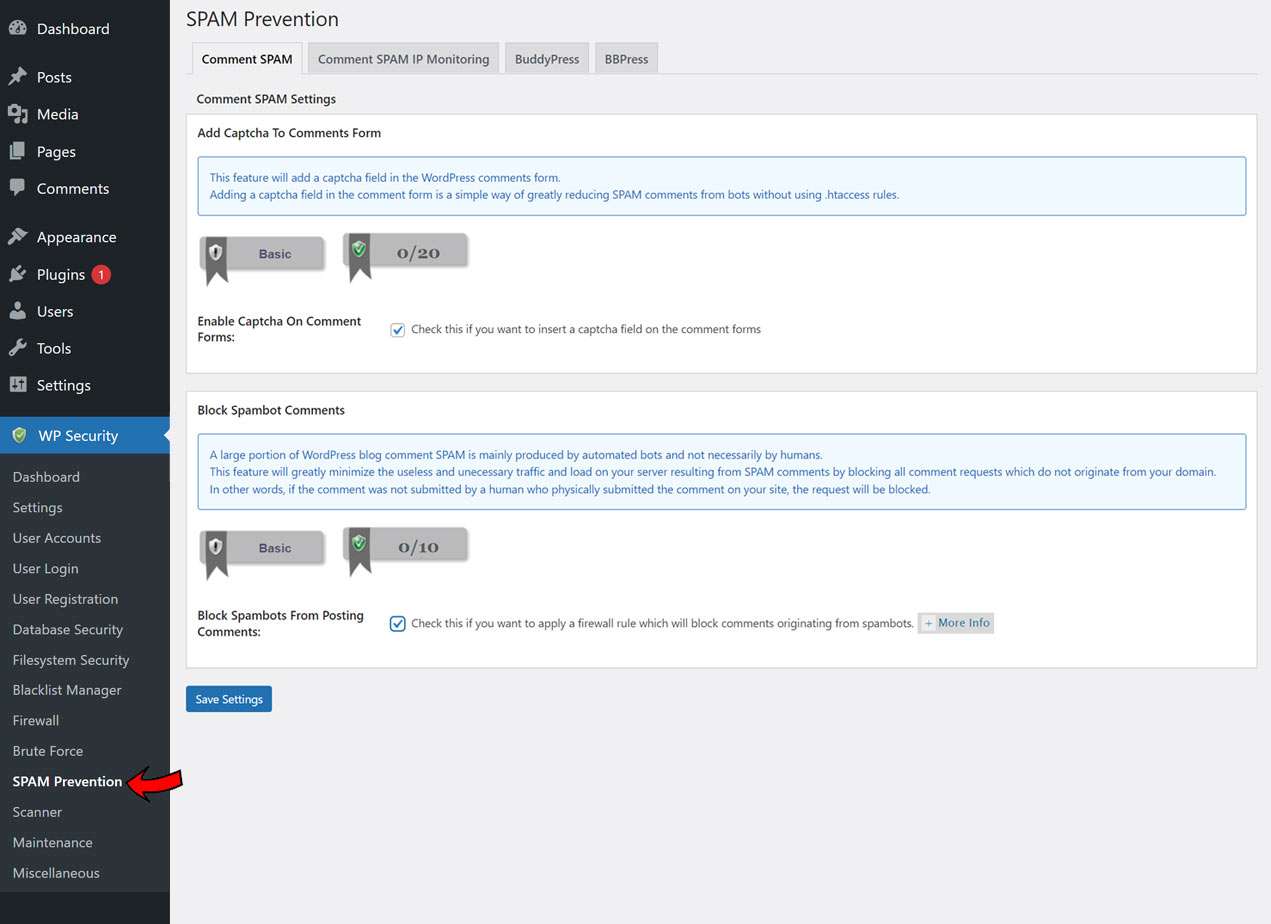
SPAM Prevention:
This option offered by All In One WP Security plugin can be used to enhance the WordPress security by filtering out the spam comments. There are 4 tabs under this option but you will mainly need the Comment SPAM and Comment SPAM IP Monitoring. Rest of the 2 tabs- BuddyPress and BBPress are required if you use those apps specifically.
For the Comment SPAM tab, you must check both the check boxes which will introduce a Captcha before anyone can comment and also the known or recognized ‘Spambots’ will be blocked automatically. Then you can save the settings.
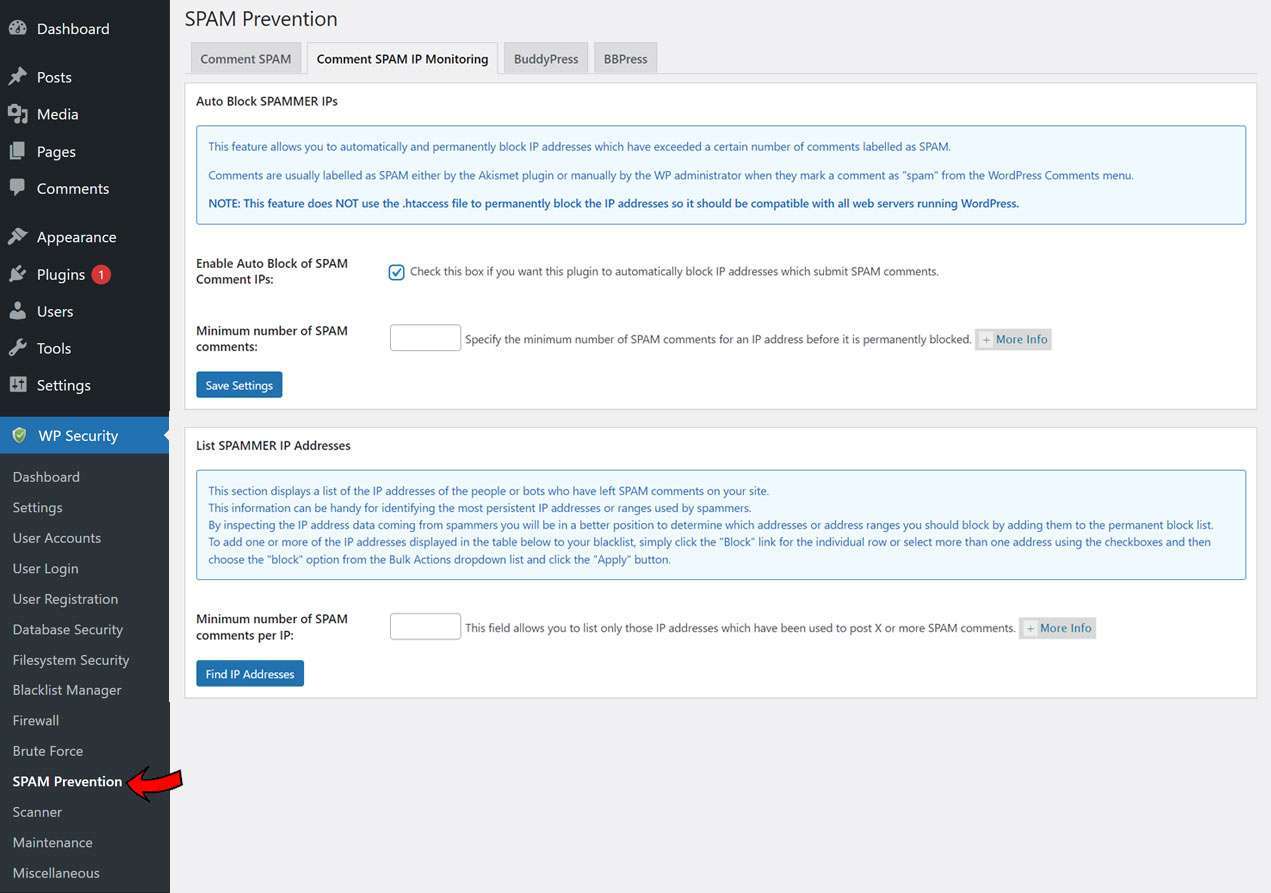
Under the Comment SPAM IP Monitoring tab, you can Enable the automatic blocking of the SPAM Comment IPs and save the settings then. This will decrease the number of comments because the SPAM IP addresses will be recognized and blocked.
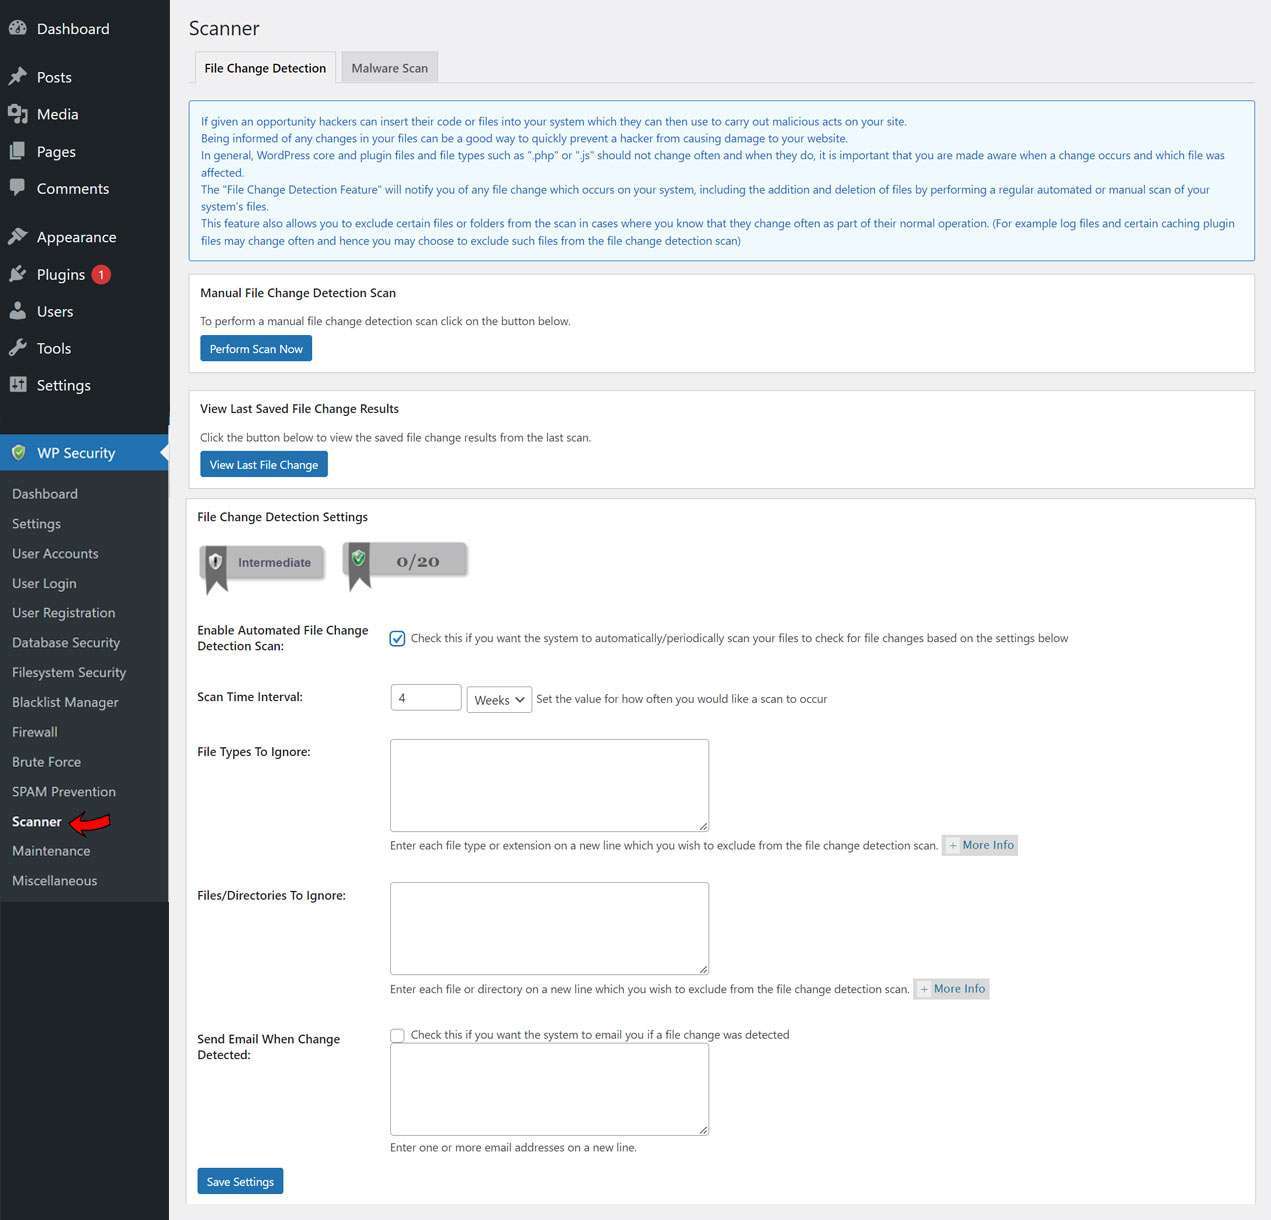
Scanner:
It is a good option since it Scans for Malware. From this option, you can trigger a ‘Manual File Change Detection Scan’ with the ‘Perform Scan Now‘ option and also set up your system to generate automatic scans of the key files in WordPress. Just check the ‘Enable Automated File Change Detection Scan‘ and save the settings.
Conclusion..
In this guide, we have discussed the ways How to Secure a WordPress website through All In One WP Security plugin. All In One WP Security is a very popular plugin that most WordPress Users use for their websites. Hence, you must stay aware of all its features and functionalities.
We hope that you have understood all the important points regarding this All In One WP Security plugin through this guide. Thanks!