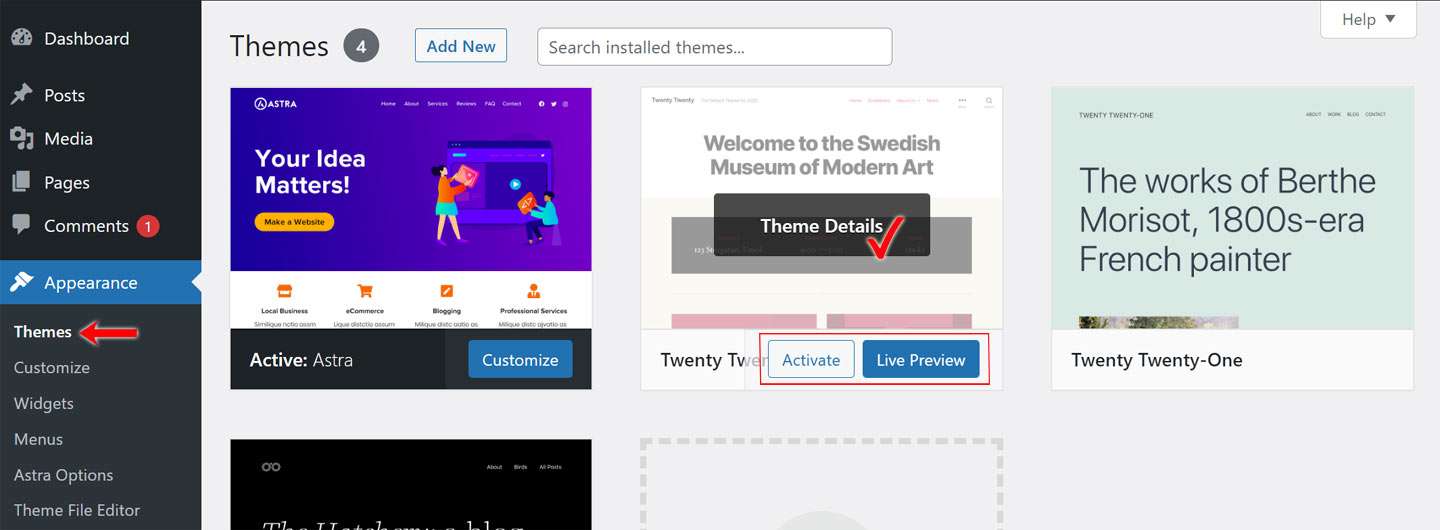
You can access the Themes options page simply thru Appearance > Themes. This enables you to Add, Delete, Edit, Activate, Deactivate – that means – precisely it helps you manage a whole host of activities linked to the appearance of your WordPress Themes. The theme that is currently active will be specified below your theme’s screenshot in the footer column containing the word Active. By moving over other theme screenshots available, you will get the Theme Details, Activate option, and its Live Preview links.
Theme Details: If you click on the specific Theme Detail, it will show you its version, author, and other information.
Activate: If you click on Activate link, the respective theme will get activated by replacing the currently active theme.
Live Preview: It displays a Preview of how your website will look like if that corresponding theme is activated.
[affcoups id=”5001″]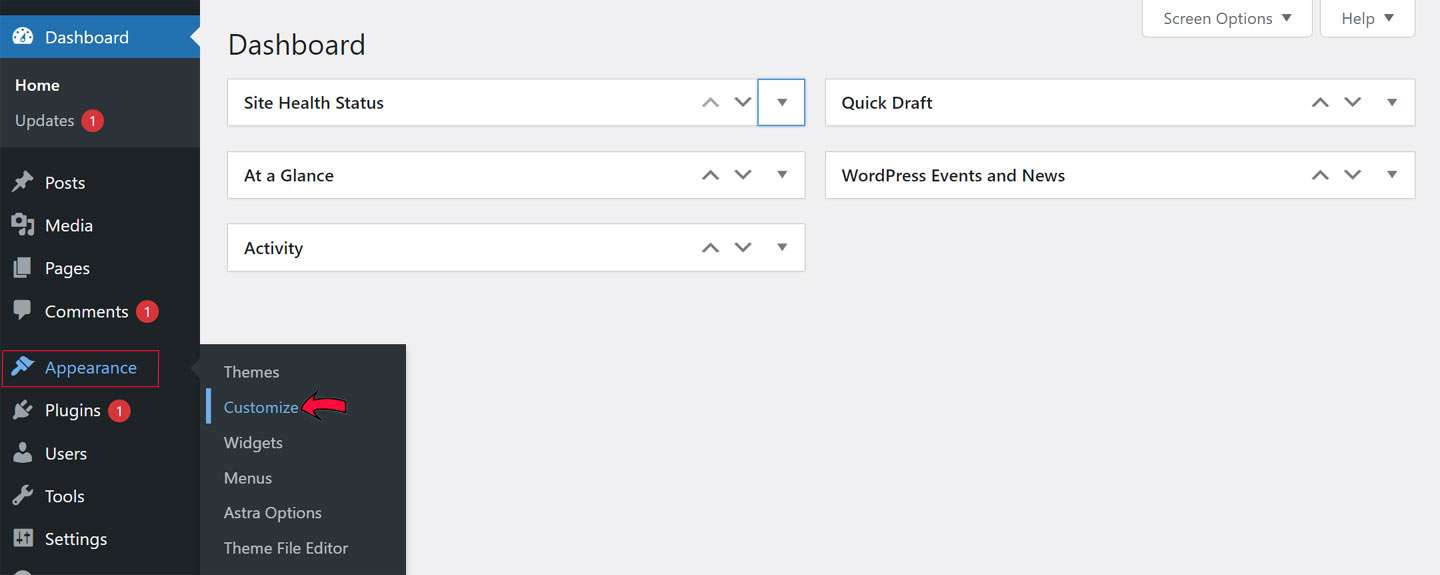
You can access the Customizer tool in WordPress via Appearance > Customize which gets you a preview of your active theme together with an array of options that impact your website’s design. It’s noteworthy, the options in Customizer sections may vary depending on whether you go for default/free or premium (paid) themes in terms of their look and number of options. The section also enables you to alter varied sections and the appearance of your site by adding a title, default color Logo, Menus, Widgets, Homepage settings, and also with custom CSS.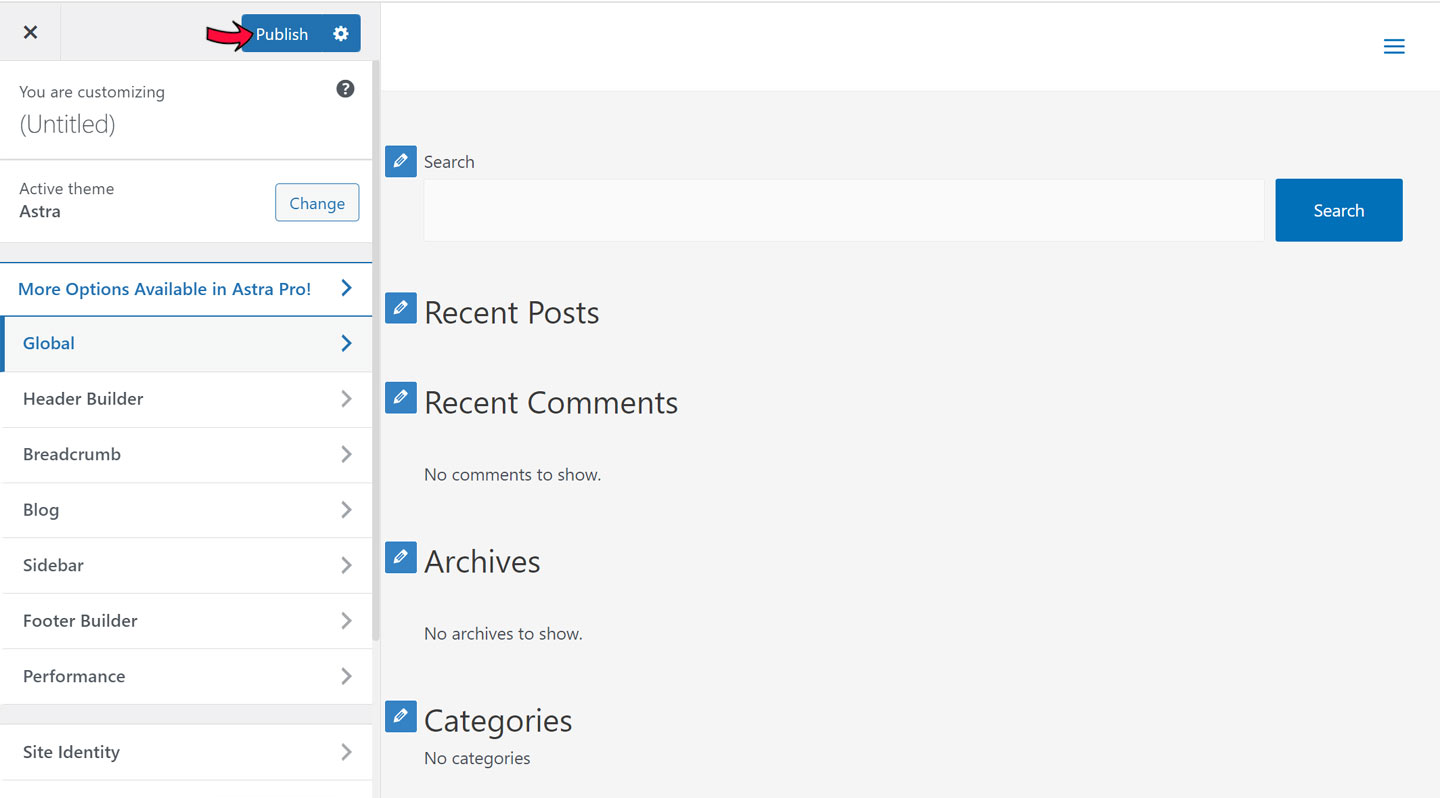
Unless you press the Publish button option, only the preview of the theme will be updated. Changes will be found to the theme as live as customized by you only when you click the ‘Publish‘ button.

The Widgets submenu is accessible via Appearance > Widgets enable users in managing the widgets found in different areas of your currently active theme like Sidebars, Footer, and Header widget area. You need to drag widgets from the left-hand side of the interface and drop them on the right-hand side to show them on your screen. The widgets can be organized in any order thru dragging and dropping.
Once your job is done, never forget to press the ‘Save’ button located at the bottom of the widget options panel. To name a few among the standard widgets that WordPress provides include Archives, Calendar, Custom Menu Categories, Recent Posts or Recent Comments, and more. You can also Add New Widgets via Plugin Installation and activation in WordPress.
[affcoups id=”5377″]
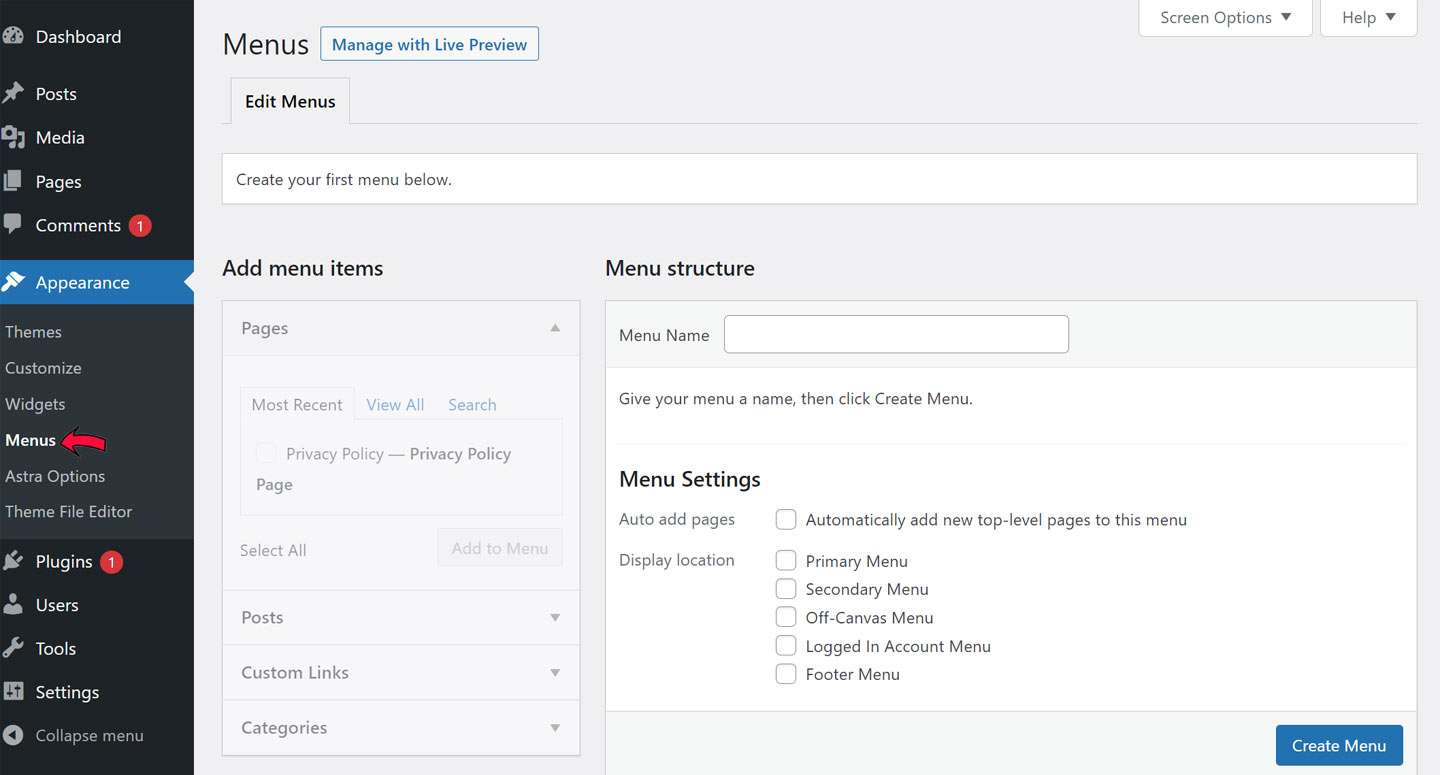
The Menus setting screen is accessible via Appearance > Menus. This enables you to create as well as manage menus by adding and modifying Pages, Posts, Tags, Categories, tags, and several other content types to the menu. Akin to Widgets, Plugins can help add newly customized Post types and that can be added to a Menu, if configured for doing so. Now let us see How to Add/Modify and Save pages to a Menu.
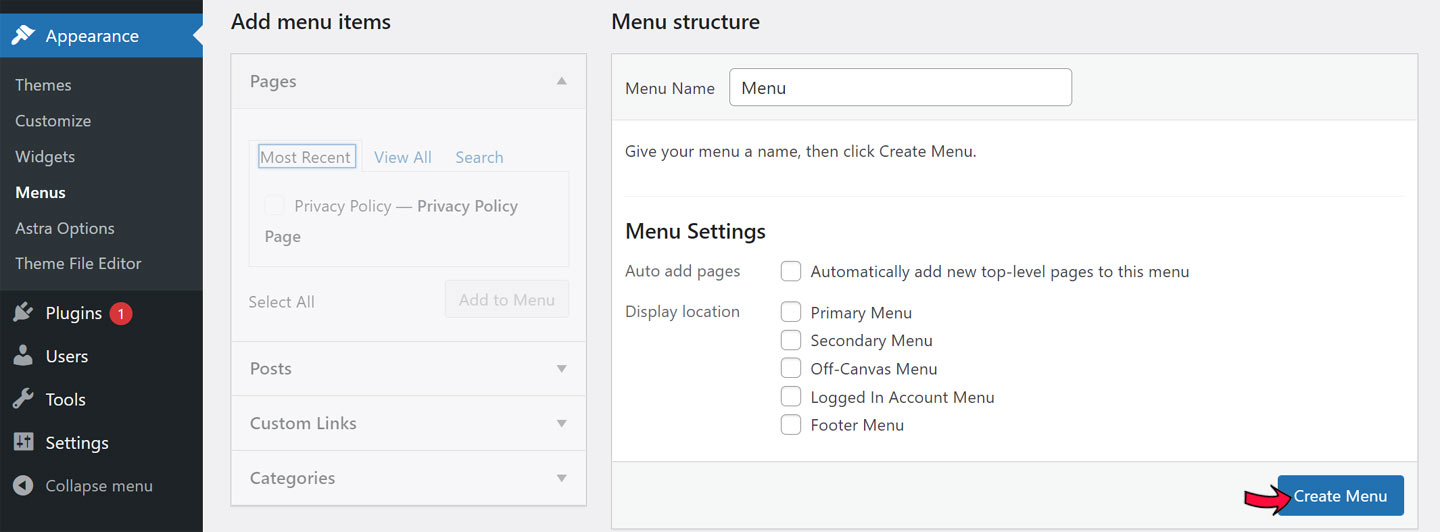
To add a Page, first you need to create a Menu which will contain the page. For doing this, click the link of Create a New Menu and thereafter follow the directions to be found on-screen.
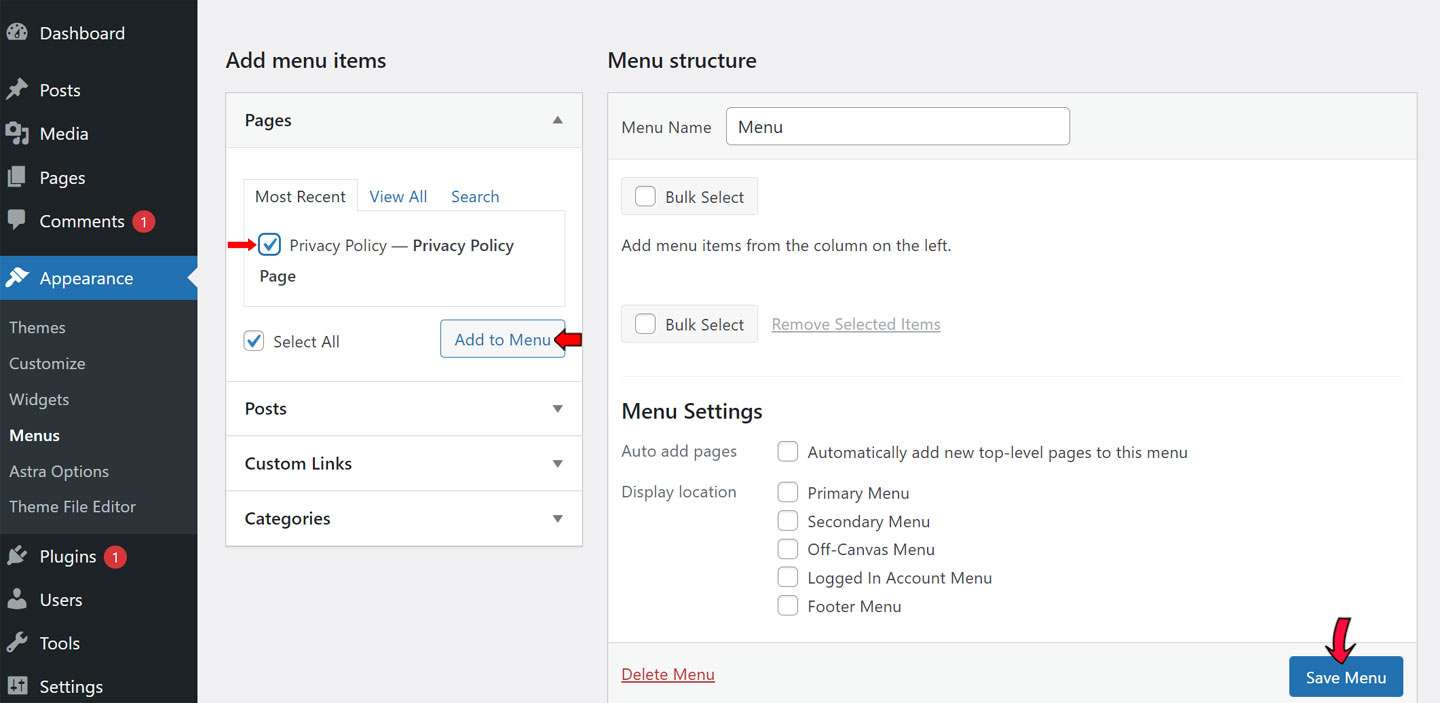
Next, on creation of the Menu, necessary items can be added to your menu by locating them on the left-hand part of the Menus Screen, then by putting a tick mark in its respective check box, and thereafter by clicking the Add To Menu option button.
Lastly, the menu is required to be added to a location as configured within the theme for displaying menus. To perform this, once the menu is saved, make sure to click on the Manage Menus tab. Also, allocate your menu to the chosen desired location, and then click the ‘Save Changes’ button.
To modify any menu item options click the Arrow corresponding to it, make the modification as desired by you, and then click the ‘Save Menu’ button. The Navigation Label option will get changed with the name of the link and will display in the menu according to the actual title of the page.
In order to bring any kind of alteration in the arrangement in which you want the items to appear in the Menu, all you have to do is simply click and drag the items to a new setup as you desire. Similarly, you can generate a sub-menu to display as a drop-down menu on the front-end part of the website.
[affcoups id=”4850″]
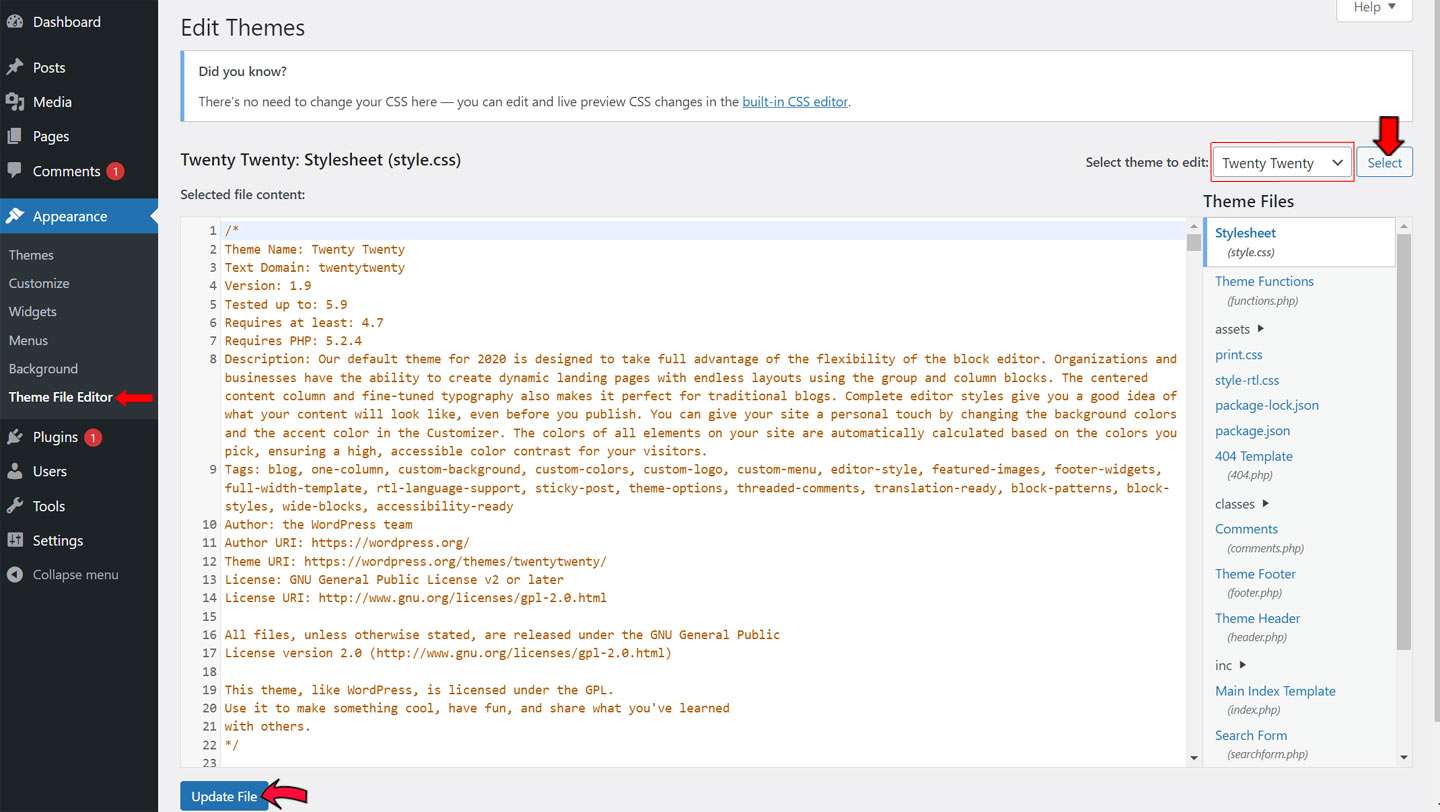
The Editor submenu is accessible via Appearance > Theme File Editor enables the users to make edits directly to their Theme Files and Templates from the WordPress Dashboard. Thus, the editor can be used as an extremely helpful option to modify your theme’s style.css file to Add, Modify or Delete existing CSS rules.
In addition, you can also Edit any sort of file prevailing in your themes like PHP or JavaScript files. However, one lacking part of the Theme File Editor is that it doesn’t allow the user to access any files located inside directories within the theme’s folder while only the top-level files can be edited.
To use the Theme File Editor, select the relevant theme from the upper-right hand drop-down menu. By default, the option selects the currently active theme, however, make sure to confirm before advancing to edit. Once the desired theme is chosen, locate the file that you are intended to edit from the right-hand list and accordingly click it. The content with the file will get loaded into the editor for editing. Once edit work is completed, hover over the Update File button located at the bottom of the screen and click it.
Note:
Considering the likelihood of losing your customization when updates happen to the theme you are recommended to create a Child theme.
Conclusion:
Learning all about the WordPress Appearance option is an effective way to bring changes in Menus, Sub-menus as well as Themes and make them customized as you desire. Hopefully, you will find the above guide helpful for you to explore them and make your site’s appearance appealing to your readers.