WordPress has gained immense popularity among bloggers and developers as a famous content management system (CMS). For publishing a blog on your website, you need to create WordPress Posts that let the audience get the information regarding news, sports, or whatever.
It is worth noting that Pages and Posts are the main components of WordPress. Hence, it is essential to know How to Create Posts? To help you with that, we have created this guide to provide you with all the information that you need to know.
In simple words, articles or blogs are the most commonly used words to resemble posts. Let’s now focus on the detailed explanation of How to Create Posts in WordPress.
Key Content of How to Create WordPress Post-
How to Adding/Creating New WordPress Posts
Below are some of the simple steps to Add New Posts in WordPress:
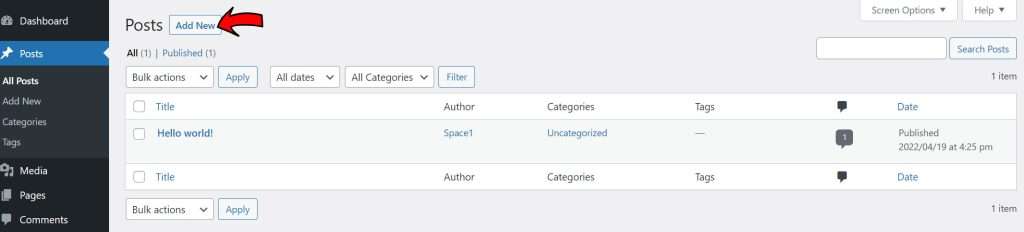
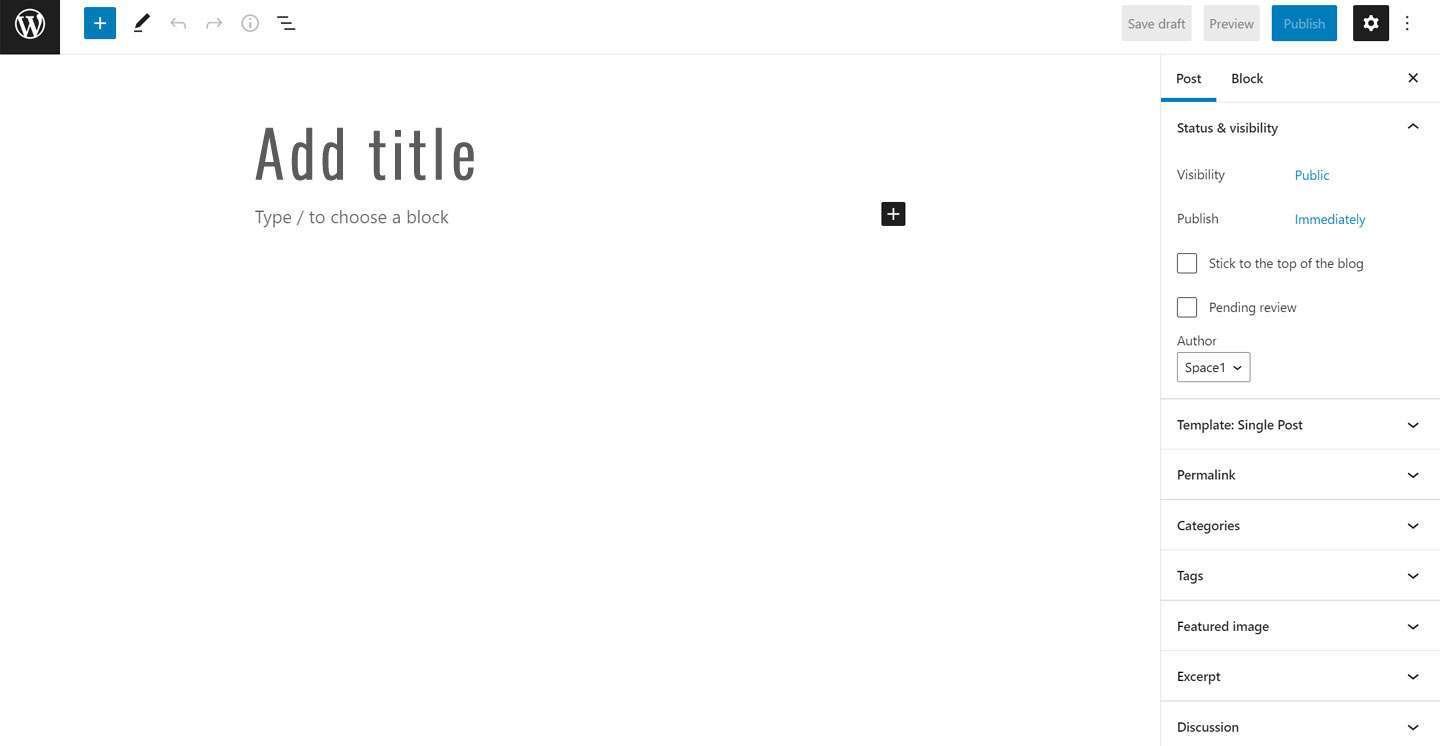
Step 1 – From the WordPress dashboard, you need to click on Posts and then Add New. This will take you to the editor of WordPress with a small space for adding a title and a larger portion to add the body of your article.
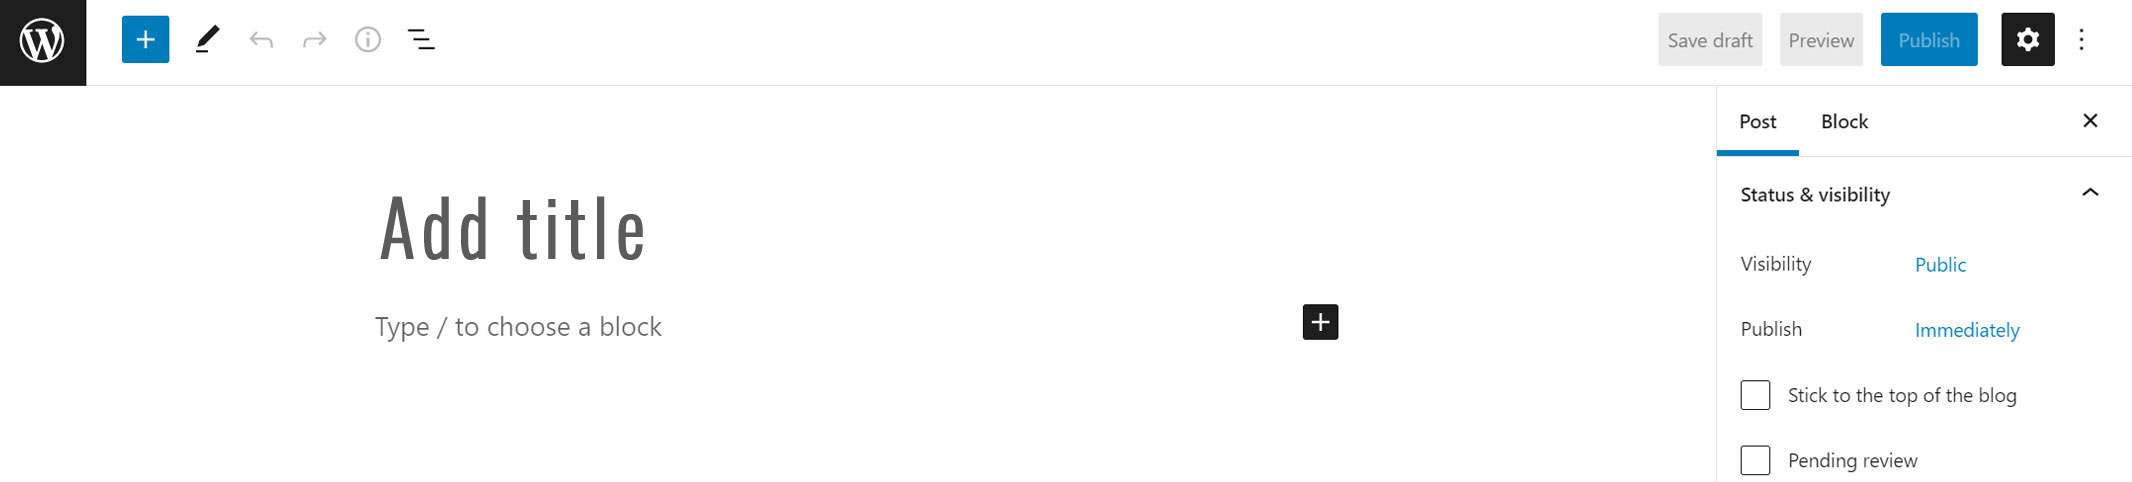
Step 2 – As mentioned in the previous step, there are two sections in the editor. One is the Page Title section where you need to add the title of your posts for making it easier for the audience to find what they are looking for. Another is the Post Content where you need to write down the body of your content.
The traditional Classic editor of WordPress has been updated to the brand-new editor known as the Gutenberg editor or the Block editor. However, there are still options to change it to the classic editor if you wish to. But, there are various advantages of using the Block editor since it presents to you various blocks making your task a lot easier.
The basic types of blocks in the Block editor include Paragraph, Column, Heading, etc., and also various Widgets, such as, Latest Comments and Search. You can even transform a block into another block such as converting a Paragraph into a Heading.
Let us now go through some of the blocks and other things that you will find on the screen while writing a post.
Media Blocks – There are also options from where you can add media content like images, videos, or even a gallery.
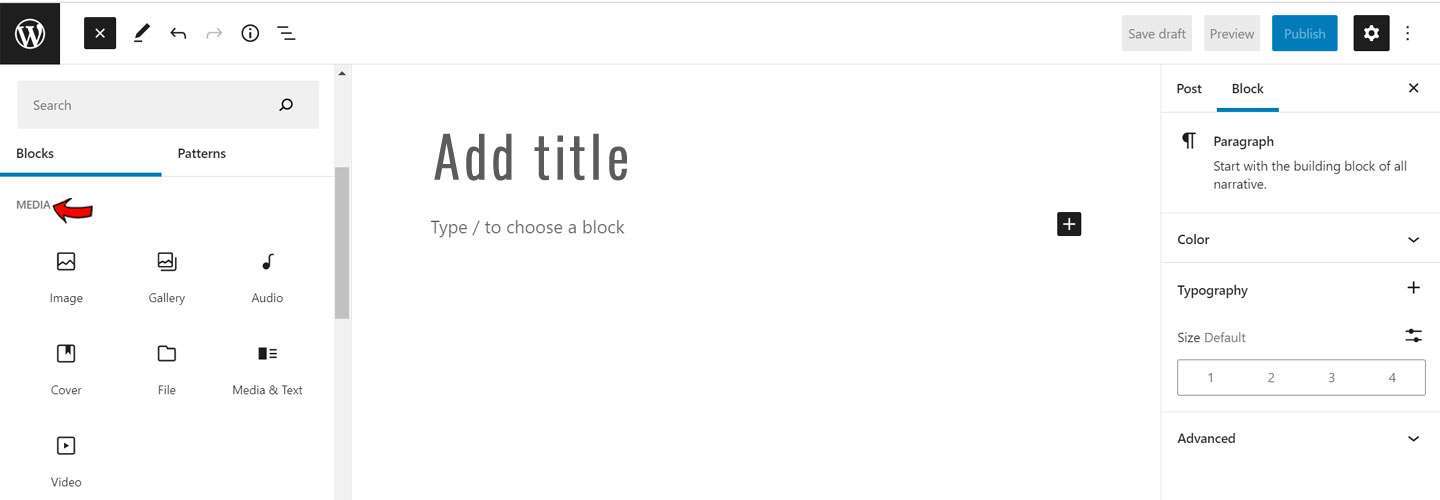
The image editing process can also be performed easily by clicking on the Block and changing the Block Settings. In these media blocks, you will find an Upload button from where you can upload the image or video files and also add an Alt Text that helps to increase the SEO score of your post.
[affcoups id=”5001″]WordPress Post Setting Options
Status and Visibility – These are mainly used to gather information like the author’s name, publish date, visibility status, and also if the post is sticky or not.
Permalinks – This is the portion of the URL that displays after the domain name. Usually, the title of the post is mainly used as the permalink since it contains the focus keyword. However, if you want, you can also change it as per your preference.
Categories/Tags – For improving the SEO of your post, you must include categories and tags in the posts. To add a New Category, you can click on Posts from the WordPress Dashboard and then Categories or Tags.
Featured Image – Adding a featured image to your posts boosts the overall SEO. It’s the main image that appears on the screen as soon as someone clicks on the post. To implement better SEO techniques, you can add the title of your post in the Featured Image.
Excerpt – Just like the movie teasers, teasers or a summary of a post is referred to as an excerpt. You can do that by going to Settings->Post-> Excerpt, and then write down in the box provided.
How to Publishing the WordPress Post and Making it Live
By now, you know How to Create Posts in WordPress. So now, it’s time to publish! There are 3 main publishing options offered by WordPress.
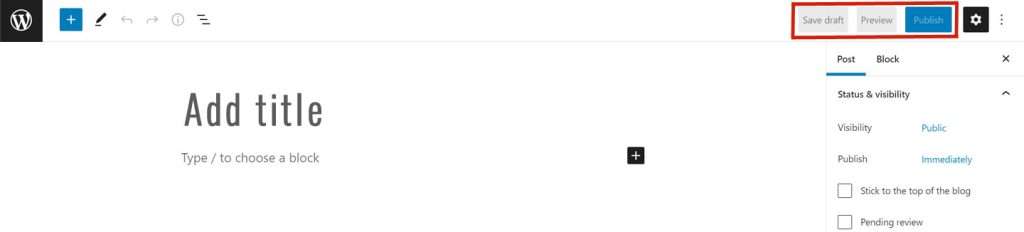
Save as Draft – At frequent intervals, WordPress saves the changes made to your post automatically, but it’s a good practice to save your posts as a draft from time to time. Even after publishing the post, you can switch back to drafting the post.
Preview – As the name suggests, it helps you to watch how the post will look once it is published. This will help you to adjust the posts as per customer preference.
Publish – Once everything is finalized, you can hit on the Publish button to make it Live on the web. At that time, it will show you the visibility of the post, date, time, etc.
How to Editing and Deleting the WordPress Posts

Editing the WordPress Posts:
With time, there are situations when you need to make some changes in the posts and that is when you need to edit them.
Step 1 – From the left-hand side of the WordPress Dashboard, click on Posts-> All Posts.
Step 2 – You can directly move on to the Post by scrolling or even searching for the post you want to edit from the search field.
Step 3 – Once you reach the desired post, just hover your cursor to get some options beneath the Post Title. You can see 2 types of editing options – Edit and Edit Quick post.
Let’s discuss the difference between them-Edit – By clicking the Edit option, it will take you to the Posts page where you have full flexibility to change whatever you want to. Once the changes are done, you need to click on the Update button.
Quick Edit – This option will not take you to the Posts page and also you can’t change the Post Content. Rather, it will allow you to make some changes to the Title, Slug, Date, Categories of the post. After making the necessary changes, click on the Update button to commit the changes.
[affcoups id=”5377″]Deleting the WordPress Posts:
WordPress Dashboard allows two methods to Delete a post-
Settings-> Move to Trash. Select the Post and Delete it.
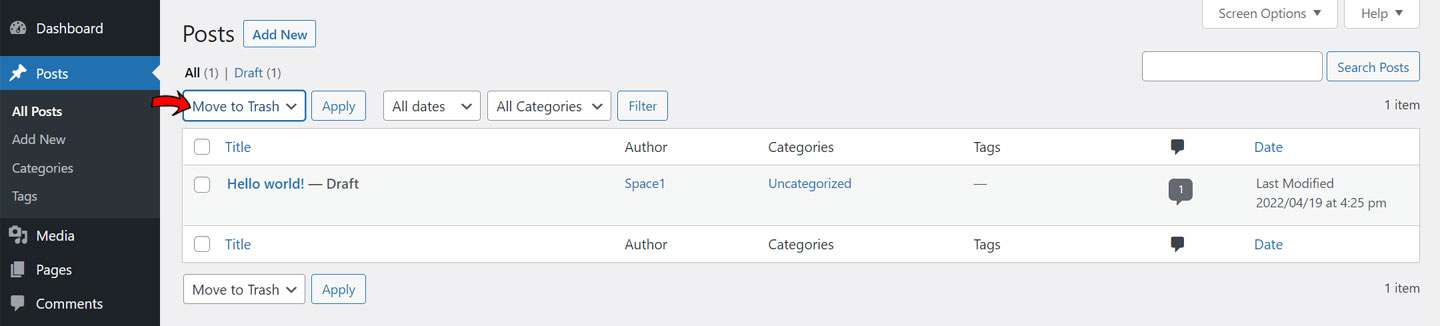
Posts-> All Posts-> Hover the cursor to the desired post-> Move to Trash.
These posts don’t get Permanently deleted; rather they are saved in Trash for 30 days. You can even Restore those posts from Trash if required.
Conclusion
In this guide, we have discussed all the prerequisites that you need to know for Creating WordPress Post. Hope you have found it useful and informative.
Since you have gained enough theoretical knowledge, now it’s time to implement it practically. So, what are you waiting for? Start creating a Post now by following the steps
There are a lot more blocks and settings that you can do which we have not discussed here. It’s because you can easily go through them once you start practicing.
But, even if you follow this guide only, it will be enough for you since all the basic and important information is covered.